Crochet Rainbow Cats – Step-by-Step Guide
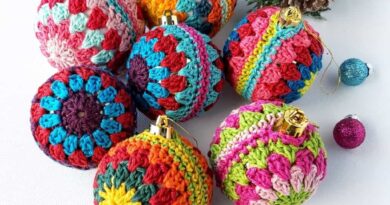
There’s something truly magical about crochet – the way a single strand of yarn, loop after loop, transforms into a work of art that holds warmth, personality, and charm. Among the many delightful crochet creations, amigurumi cats hold a special place in crafters’ hearts. They combine the joy of shaping adorable animals with the endless possibilities of color, texture, and detail. This project brings that joy to life with rainbow-colored yarn, turning each little stitch into a burst of happiness.
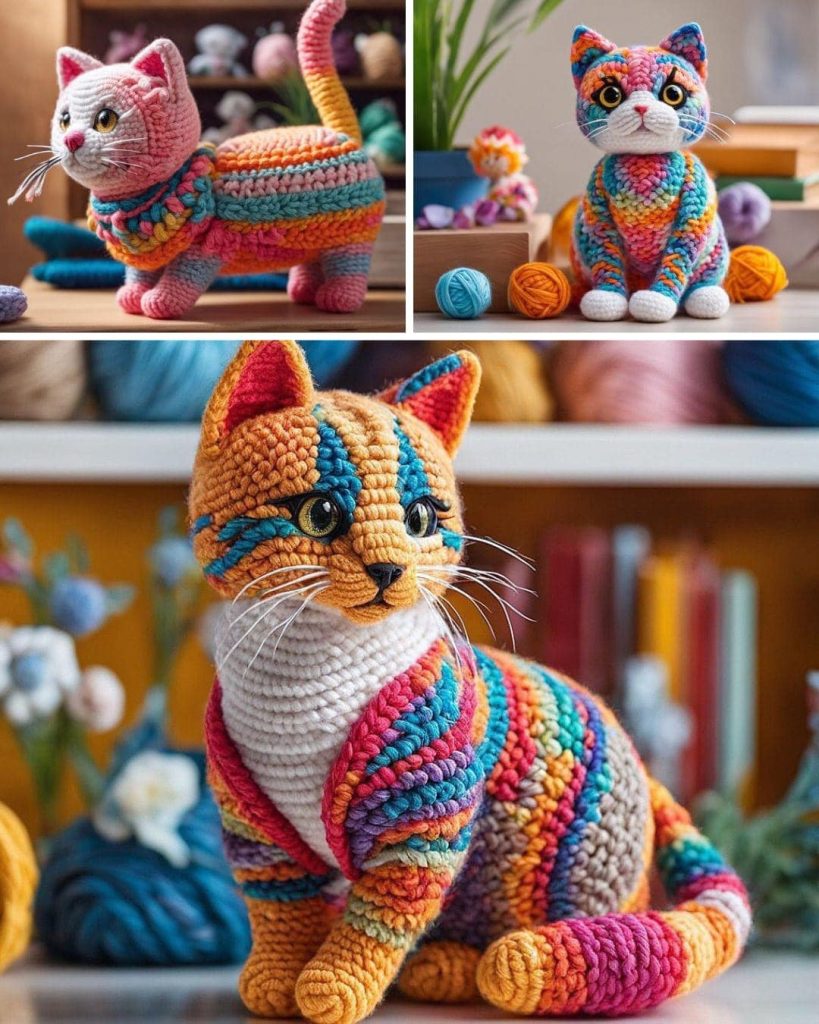
Crocheting cats is not just a hobby; it’s an act of storytelling through thread. Every color you choose, every expression you shape, tells a different story – from playful kittens to elegant feline companions. The rainbow design in this project adds vibrancy, making each cat a cheerful reminder of creativity and imagination. It’s a project that will light up any space and bring smiles to anyone who sees it.
One of the most rewarding parts of making these crochet cats is the freedom they give you as a maker. You can create them in realistic colors, mimic your own pet, or let your imagination run wild with a rainbow palette like the ones in the photos. They make perfect gifts for cat lovers, delightful décor for craft rooms, or simply a way to brighten your day with handmade beauty.
Whether you’re an experienced crocheter or picking up the hook for the first time, this pattern is approachable and fun. You’ll practice basic amigurumi techniques, shaping, color changes, and simple embroidery for facial details. Best of all, the end result is a soft, cuddly friend you made entirely by hand – a true labor of love. So, grab your yarn, your hook, and let’s bring these colorful crochet cats to life!
Materials Needed
- Worsted weight cotton or acrylic yarn in rainbow colors (or your chosen palette)
- Crochet hook size 3.0 mm or as recommended for your yarn
- Safety eyes (10mm or 12mm) or embroidered eyes
- Yarn needle for sewing parts together
- Polyester fiberfill stuffing
- Scissors
- Stitch markers
Abbreviations (US terms)
- MR – Magic Ring
- SC – Single Crochet
- INC – Increase (2 SC in same stitch)
- DEC – Decrease (single crochet decrease)
- SL ST – Slip Stitch
- CH – Chain
Step-by-Step Instructions
Head:
- Start with the main head color (or a rainbow stripe sequence).
- MR, 6 SC into ring. (6)
- INC in each stitch around. (12)
- (SC, INC) repeat around. (18)
- (2 SC, INC) repeat around. (24)
- (3 SC, INC) repeat around. (30)
7–12. SC in each stitch around. (30) - (3 SC, DEC) repeat around. (24)
- (2 SC, DEC) repeat around. (18) – Insert safety eyes between rounds 8 and 9, about 6 stitches apart.
- (SC, DEC) repeat around. (12) – Begin stuffing firmly.
- DEC around. (6) – Fasten off and close.
Body:
- MR, 6 SC into ring. (6)
- INC in each stitch around. (12)
- (SC, INC) repeat around. (18)
- (2 SC, INC) repeat around. (24)
- (3 SC, INC) repeat around. (30)
6–10. SC in each stitch around. (30) - (3 SC, DEC) repeat around. (24)
- (2 SC, DEC) repeat around. (18) – Stuff as you go.
- (SC, DEC) repeat around. (12)
- DEC around. (6) – Fasten off and close.
Ears (make 2):
- MR, 4 SC into ring. (4)
- (SC, INC) repeat twice. (6)
- (2 SC, INC) repeat twice. (8)
- SC around. (8) – Fasten off leaving a long tail.
Tail:
- CH 16, SC from 2nd CH from hook across. (15)
2–3. SC in each stitch across. (15) – Fasten off, leaving tail for sewing.
Assembly
- Sew the head to the body securely.
- Attach ears to the top sides of the head.
- Position and sew the tail to the back of the body.
- Embroider nose, mouth, and optional whiskers with black yarn or embroidery thread.
- Add any extra details like a collar, bow, or scarf for personality.