🧵 Easy DIY Hexagon Pincushion – A Sweet Little Project for Any Sewist
If you love patchwork, English paper piecing, or just adorable sewing accessories, this DIY hexagon pincushion will steal your heart! It’s quick, fun, and a perfect way to use those fabric scraps you’ve been saving. Whether you’re an experienced quilter or just starting out, this is a low-pressure project with delightful results.
The best part of this pincushion is how it blends hand sewing with classic patchwork charm. The combination of colorful hexagons, soft stuffing, and functional design makes it a joy both to create and to use at your sewing station. You can easily match it with your sewing room decor or gift it to a crafty friend!
This project also introduces you to the relaxing world of English Paper Piecing (EPP) — a hand-stitching method that involves wrapping fabric around paper templates. It creates sharp, accurate shapes with satisfying symmetry. Once your hexagons are ready, the assembly is surprisingly simple and requires just a little stuffing to bring it all together.
Whether you’re making just one or a whole bouquet of these pincushions, this is the perfect “weekend craft” that’s practical, portable, and irresistibly cute. Let’s get started!
✂️ Supplies Needed:
- 7 fabric hexagons (approx. 1″ each side) for the top
- 6 fabric hexagons for the bottom (optional: match or contrast)
- Paper templates (1″ hexagons)
- Fabric glue or thread for basting
- Hand-sewing needle and thread
- Small amount of polyfill stuffing
- Scissors or rotary cutter
- Optional: fussy cut a floral or motif for the center hexagon
🪡 Step-by-Step Instructions:
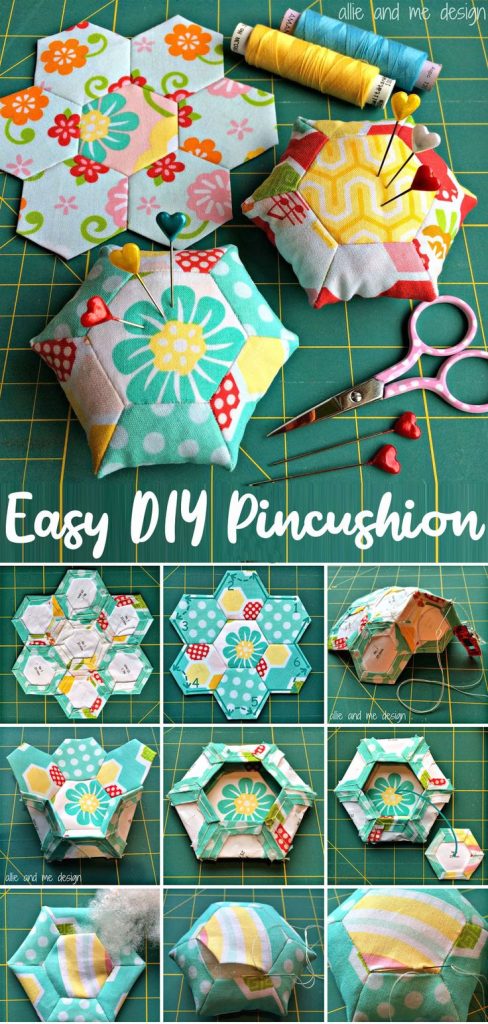
1. Prepare your hexagons:
- Wrap each fabric hexagon around a paper template.
- Baste or glue the fabric in place (on the back).
- Make at least 13 hexagons (7 for the top, 6 for the bottom).

2. Assemble the top:
- Arrange 1 center hexagon and surround it with 6 others in a flower shape.
- Hand stitch them together with a whipstitch, joining edge to edge.
3. Build the bottom panel:
- Join the remaining 6 hexagons in a circle (no center).
- This will become the base of your pincushion.
4. Sew it up:
- Place the top and bottom right sides together.
- Stitch around, leaving a small opening.
5. Turn and stuff:
- Carefully turn your pincushion right side out.
- Fill with polyfill until it’s plump but not too firm.
- Stitch the opening closed by hand.


