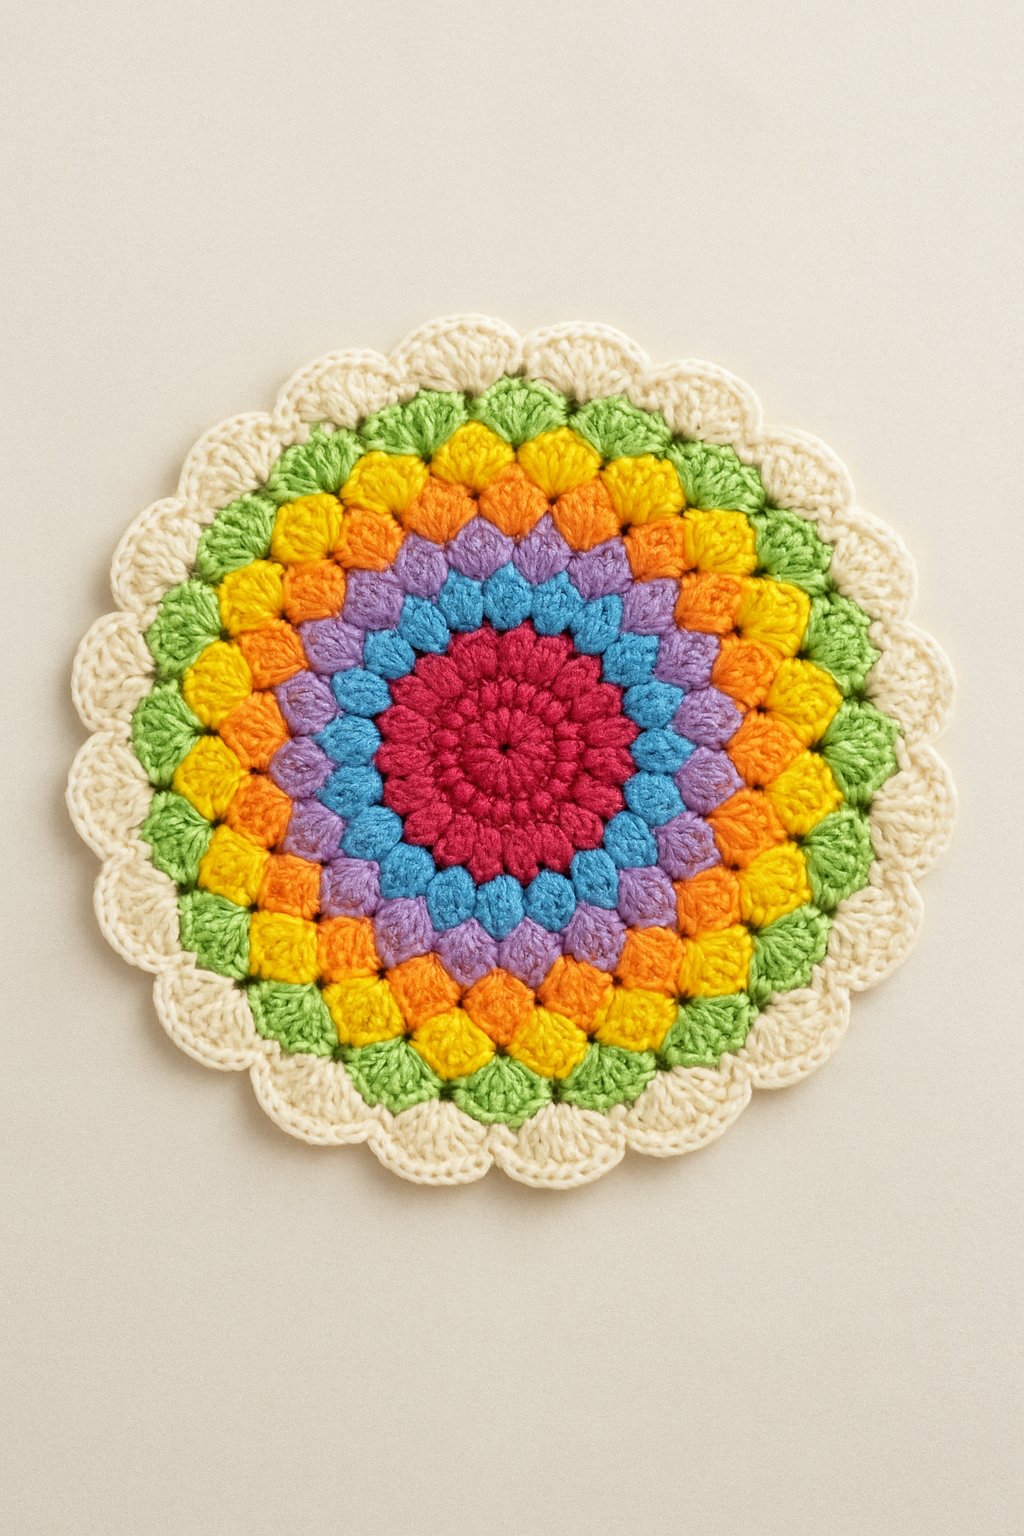
Rainbow Puff Mandala Crochet – Step by Step Tutorial
Crochet mandalas are more than just decorative pieces; they carry a sense of balance, harmony, and creativity. Each round grows outward like ripples in water, giving the maker a soothing rhythm as the stitches unfold. The project shown here combines puff stitches with vibrant colors, creating a joyful piece that can be used as a table centerpiece, a wall hanging, or even the base of a cushion cover.
What makes this design so delightful is the use of puff stitches. These raised, textured stitches give the mandala a soft, 3D effect, making it more dynamic than flat crochet circles. When worked in rainbow colors, each round becomes a celebration of brightness and positivity, instantly catching the eye and lifting the mood of any space.
Mandalas are also very beginner-friendly. Although this pattern looks intricate, it repeats a simple structure: rounds of increases, puff stitches, and chain spaces. Once you learn the puff stitch, the rest of the pattern flows naturally, making it a relaxing project for evenings or weekends. The repetitive rhythm of crochet is known to be calming, which makes this mandala not just a craft, but a little therapeutic journey.
Another wonderful feature of this piece is its versatility. By changing yarn thickness and hook size, you can adapt it to different uses: fine cotton thread for delicate placemats, thicker yarn for colorful rugs, or gradient yarns for a smooth color transition. Whether you make it in bold rainbow shades or in soft, neutral tones, this puff stitch mandala will always stand out as a beautiful handmade work of art.
Materials
100% cotton yarn (DK or similar) in various colors + ecru for finishing
4.0 mm needle (adjust according to your yarn)
Scissors and tapestry needle
Optional: fabric glue/sewing thread for finishing and blocking
Abbreviations (US)
MR = magic ring • ch = chain stitch • sl st = slip stitch
sc = single crochet • dc = double crochet • puff = (yo, insert, pull through loop) ×4, yo, close; ch 1 to secure the puff
Tip: Pull the loops of the puff at the height of a dc so the circle is flat.
Instructions
Round 1 (Color A – center):
MR, ch 2 (does not count), 12 dc in the ring. Close with a sl st. (12)
Round 2 (Color B – 1st row of puffs):
Ch 1, puff in the top of each dc, ch 1 repeat around. Join with a sl st in the first puff. (12 puffs / 12 ch-1 spaces)
Round 3 (Color C – create 24 spaces):
Sl st to the first space; (ch 2, dc, ch 1) in the same space;
in the next space: dc, ch 1, dc, ch 1 — repeat around. Join with a sl st. (24 dc separated by ch-1)
Round 4 (Color D – 2nd row of puffs):
Ch 1, puff in the next dc, ch 1 around (work a puff over each dc from the previous row). Fasten off. (24 puffs / 24 spaces)
Round 5 (Color E – increase to 36 spaces):
Sl st to the first space; dc, ch 1 in the same space;
in the next space: dc, ch 1; in the next space: (dc, ch 1, dc, ch 1) in the same space — repeat the pair [1 single, 1 increase] around. Fasten off. (36 spaces)
Round 6 (Color F – 3rd round of puffs):
Ch 1, puff in the next space, ch 1 around. Fasten off. (36 puffs)
Round 7 (Color G – increase to 48 spaces):
Sl st to the first space; dc, ch 1 in the same space;
next space: dc, ch 1; next space: dc, ch 1; next space: Space: (dc, ch 1, dc, ch 1) in the same space — repeat the pattern [2 single crochet, 1 increase] around. Fasten off. (48 spaces)
Round 8 (Color H – 4th round of puffs):
Ch 1, puff in the next space, ch 1 around. Fasten off. (48 spaces)
Round 9 (Off-White – Lace Beak):
Sl st to the first space, sc in the same space;
skip 1 space, 7 dc in the next (shell), skip 1 space, sc in the next — repeat around.
Adjust to 6 dc in the shells if you want to create a ruffle with your yarn. Fasten off and hide the ends.
Size & Adjustments
With DK yarn and a 4.0 mm hook, the finished diameter is ~28–32 cm.
To increase: Repeat the “increase row (dc/ch-1)” + “puff row” pair, remembering to distribute ~12 increases on each increase row.
Tips
Always ch 1 to close each puff (locks the stitch).
If it starts to ripple, undo and redo the increase row with fewer shells/more spacing; if it shrinks, add a few extra increases.
Lightly block the piece to highlight the puffs and the beak.