Modern Granny Square Crochet Cardigan – Free Pattern
Crochet fashion has made a big comeback in recent years, blending nostalgic charm with modern style. This trendy cardigan is a beautiful example of how traditional granny squares can be transformed into a fashionable piece that’s both cozy and chic. Whether you’re heading out for coffee or snuggling up at home, this cardigan adds a handcrafted touch to your wardrobe.
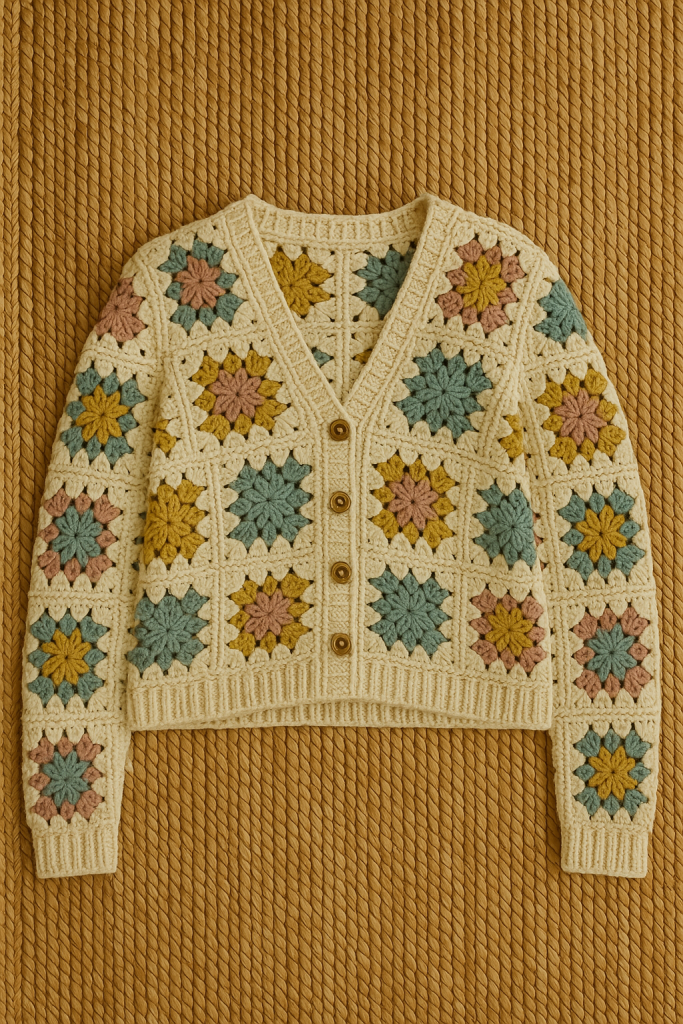
Each square is a burst of color, combining soft pastels and earthy tones to create a harmonious yet vibrant design. The use of cream as the base allows the colorful floral motifs to stand out, making the cardigan eye-catching but not overwhelming. The wooden buttons add a rustic flair and finish the piece with elegance.
What makes this cardigan especially appealing is its versatility. It pairs effortlessly with jeans, skirts, or even layered over a dress. The slight cropped length and fitted cuffs give it a flattering silhouette for many body types. Plus, it’s a fun and meditative project for intermediate crocheters looking to challenge themselves with garment-making.
Ready to start stitching? Below you’ll find the full step-by-step instructions to make your own version of this timeless piece. Grab your hook, pick your palette, and let’s get started!
🧶 Materials Needed:
- 5.0 mm crochet hook
- Worsted weight yarn in cream, mustard yellow, dusty rose, teal blue, and a touch of sage (adjust as desired)
- 6 wood buttons (2 cm diameter)
- Yarn needle
- Scissors
🧵 Instructions (Step-by-Step):
Granny Square (Make 30-40 depending on size):
- With your center color (e.g., rose), make a magic ring.
- Round 1: Ch 3 (counts as dc), 2 dc in ring, ch 1, 3 dc in ring, ch 1 repeat 2 more times. Join with sl st.
- Round 2: Change color. Sl st to corner space, ch 3, (2 dc, ch 1, 3 dc) in same space (corner made). (3 dc in next ch-1 space, corner in next ch-1 space) repeat around. Join.
- Round 3: Switch to cream. Work granny pattern around with corners (3 dc, ch 1, 3 dc) and 3 dc in side spaces.
- Fasten off and weave in ends.
Join Squares:
- Use the whip stitch or flat slip stitch method to join squares in desired layout: front panels (2), back panel (1), and sleeves (2).
- Leave neckline and armhole space.
Construct Body:
- Sew front panels to sides of the back panel.
- Attach sleeves to arm openings.
- Seam sleeves and sides of the body.
Add Ribbing and Button Band:
- With cream yarn, attach yarn to the bottom edge. Ch 7, sc in second ch from hook and across, sl st 2 into cardigan edge. Turn and repeat ribbing across.
- Repeat same for sleeves and neckline if desired.
- For button band, sc evenly along front panel, making 6 buttonholes spaced evenly.
Finishing:
- Sew on buttons.
- Block cardigan for smooth shape.
- Enjoy your new handmade creation!