Knitted Mouse with Sweater and Beret – Step by Step Tutorial
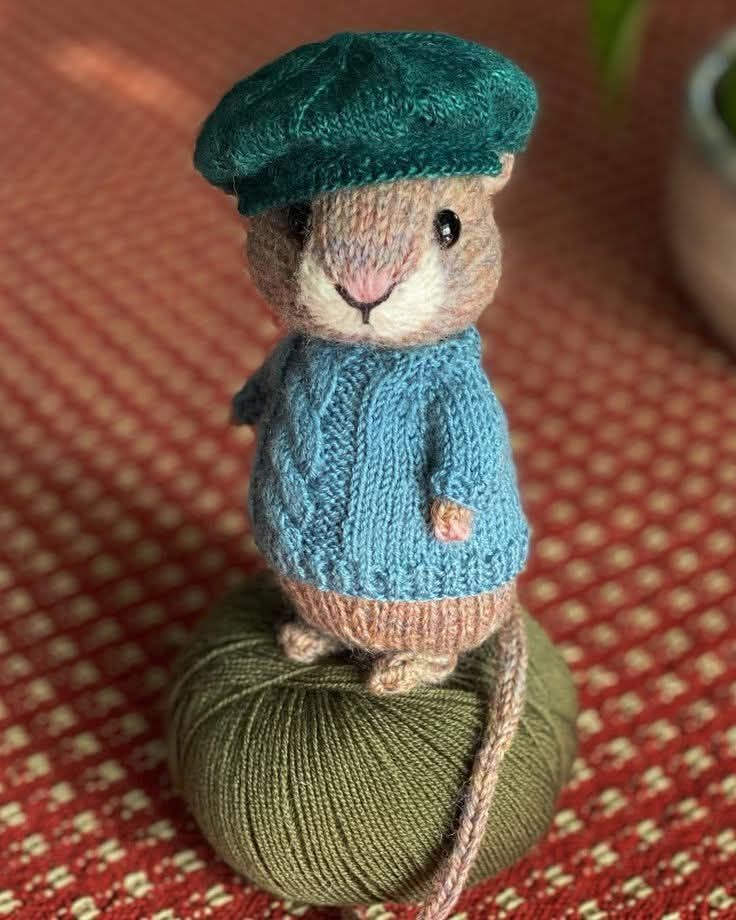
Handmade toys carry a special kind of magic. Unlike store-bought plushies, each knitted figure has a story woven into its stitches, a reflection of the maker’s time, care, and creativity. This charming little mouse, dressed in a cozy blue sweater and a stylish beret, is the perfect example of how knitting can turn simple yarn into a character full of life and personality.
Knitted animals, often called “softies” or “plushies,” are becoming increasingly popular not only for children but also for collectors and home decorators. They bring a nostalgic touch and a sense of warmth, reminding us of simpler times when toys were made by hand with love. This project is both a delightful gift idea and a creative challenge for knitters of all skill levels.
The appeal of this knitted mouse lies in its details. The textured sweater, the carefully shaped tail, the expressive face, and the tiny accessories all add to its charm. The beret gives it a European flair, making the mouse look like a little character straight out of a children’s book illustration. Choosing soft yarns and natural shades helps to give the toy a lifelike yet whimsical appearance.
If you are new to knitting toys, this project is an excellent introduction. The techniques are simple enough to follow, yet the final result looks impressively detailed. With just a few basic knitting skills—like knit, purl, increases, and decreases—you will be able to bring this adorable mouse to life. Let’s go step by step and create your own knitted mouse with sweater and beret.
Materials Needed
- Yarn in beige (for the body), pink (for ears and nose), blue (for sweater), and green or teal (for the beret)
- Knitting needles (size suitable for your yarn)
- Small amount of black yarn or embroidery thread (for eyes and facial details)
- Yarn needle for sewing pieces together
- Fiberfill stuffing
- Stitch markers and scissors
Step-by-Step Instructions
Step 1 – Knitting the Body
- Start by casting on stitches for the mouse’s body using beige yarn.
- Work in stockinette stitch, increasing gradually to form the rounded shape of the belly.
- Decrease stitches as you near the top to close the body. Leave a small opening for stuffing.
- Fill the body firmly with fiberfill and sew the opening closed.
Step 2 – Knitting the Head, Ears, and Tail
- Knit the head separately, shaping it with increases and decreases for the snout.
- Embroider a small pink nose and add eyes with black thread or safety eyes.
- For the ears, knit two small round pieces in beige with a touch of pink at the center. Attach them symmetrically.
- Knit a long i-cord for the tail and sew it securely to the back of the body.
Step 3 – Making the Sweater
- With blue yarn, knit a small sweater in flat panels or in the round, depending on your preference.
- Add simple cable stitches or ribbing for texture.
- Sew the sweater directly onto the mouse or make it removable for a fun accessory option.
Step 4 – Knitting the Beret
- Cast on stitches in green or teal yarn and knit in the round.
- Increase to form a circle, then decrease slightly to create the classic beret shape.
- Bind off and secure the beret to the mouse’s head at a jaunty angle.
✨ Now you have a stylish knitted mouse, complete with sweater and beret. This handmade toy is sure to bring joy to anyone who sees it, whether placed on a shelf, given as a gift, or cherished as part of your own handmade collection.