Granny Square Tote Bag — Step by Step
Crochet granny squares are one of the most beloved motifs in the fiber arts world, known for their versatility, vibrant colors, and timeless charm. This Granny Square Tote Bag is a perfect example of how classic crochet motifs can be transformed into a modern, functional accessory. With its bold square panels and sturdy handles, this bag is both practical and stylish, ideal for carrying your daily essentials or even as a project bag for your yarn and hooks.
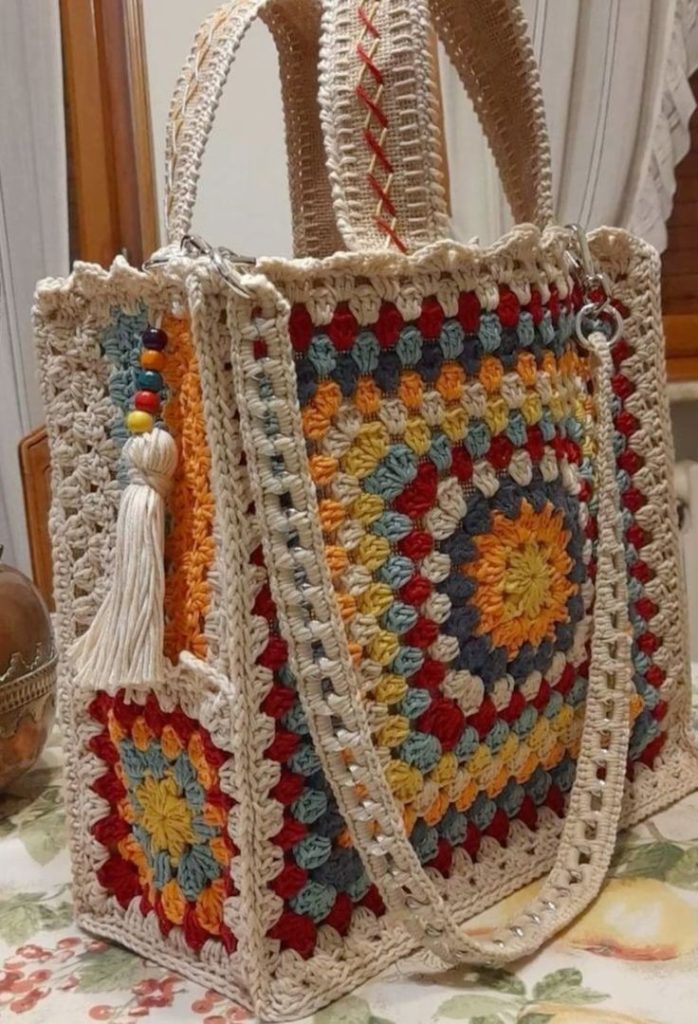
What makes this tote special is the way the granny squares are assembled to form structured panels. By joining the squares with solid edges and lining the bag, you create a durable piece that will hold its shape and last for years. The bright colors framed in natural tones give it a cheerful yet elegant look, making it perfect for year-round use. You can easily customize the color palette to match your wardrobe or to reflect the seasons.
This project is great for intermediate crocheters, but beginners can also tackle it with patience. The granny square pattern itself is simple, but the assembly and finishing will teach you valuable skills like seaming, shaping, and adding functional details like straps and lining. You’ll also have the opportunity to add fun embellishments, such as tassels or beads, to personalize your bag even more.
By the end of this tutorial, you’ll have a handmade tote bag that blends tradition with functionality. It’s a conversation starter, a sustainable alternative to store-bought bags, and a joyful reminder of the creative possibilities within crochet. Let’s dive into the step-by-step instructions and bring this stunning granny square tote to life!
Materials Needed:
- Cotton yarn in multiple colors (for the squares)
- Neutral cotton yarn (for joining and borders)
- Crochet hook (size appropriate for your yarn, usually 3.5mm–4.5mm)
- Scissors and yarn needle
- Lining fabric (optional, for sturdiness)
- Wooden or crochet handles (you can also crochet straps as shown)
- Beads and tassel for embellishment (optional)
Step-by-Step Instructions:
Step 1: Make the Granny Squares
Start by crocheting classic granny squares in your chosen colors. For each panel, make four large squares (front and back). Create additional squares for the sides and bottom. Work in rounds, alternating colors to achieve a vibrant, layered look.
Step 2: Join the Squares
Arrange the squares into panels: one for the front, one for the back, two for the sides, and one for the bottom. Use slip stitch or single crochet to join the squares together, creating neat seams. Once the panels are ready, join them together to form the bag shape.
Step 3: Add the Border and Straps
Work a few rounds of single crochet around the entire top edge of the bag for stability. Crochet two long straps using rows of single crochet or a thicker woven stitch for sturdiness. Attach them securely to the top of the bag. Optionally, add a shoulder strap for versatility.
Step 4: Finishing Touches
Line the inside of the bag with fabric for extra strength and to prevent stretching. Add a tassel with beads for decoration, as shown in the photo. Weave in all ends, block the bag lightly if needed, and your Granny Square Tote Bag is complete!