Crochet Rug “Mom & Puppy” – Complete Step-by-Step Guide
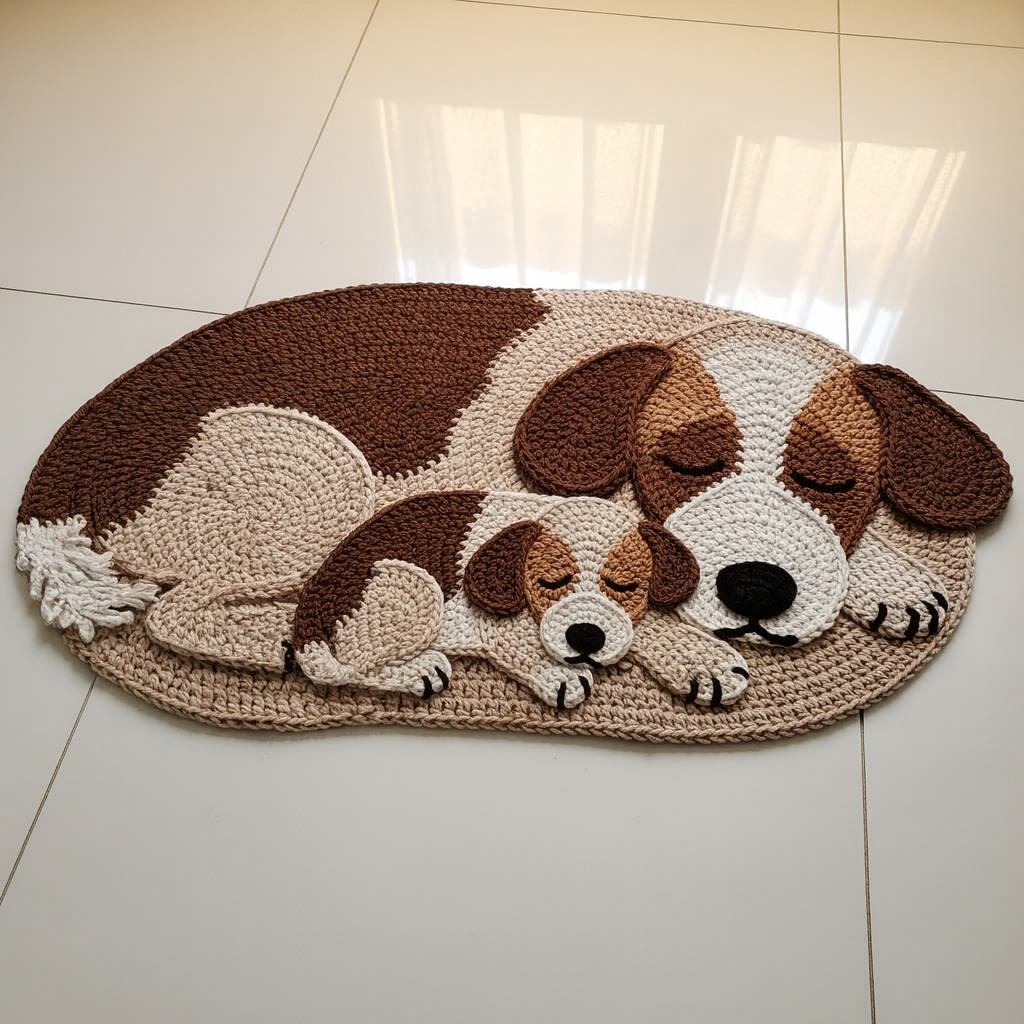
Few handmade pieces bring as much coziness as a crochet rug — especially when it tells a story of affection. This “Mom & Puppy” model depicts two sleeping dogs, cuddled together, and was designed to warm both spaces and hearts. It’s perfect for a child’s bedroom, an entryway, or a reading nook.
Besides being beautiful, the project is very enjoyable to make: you crochet an oval base and then apply crochet pieces on top to form the body, head, ears, tail, and paws. The three-dimensional effect of the ears and snout brings the design to life without making the execution complicated.
The rug is also perfect for using leftover yarn in earthy tones (beige, caramel, brown, cream, and white), with small black details for the nose and nails. If you prefer, you can even adapt the colors to “portray” your own family pet.
Below you will find the materials list, abbreviations, and detailed step-by-step instructions. Even if this is your first project with crochet appliqués, just follow the sequence calmly — the result will be surprising and highly photogenic for your blog.
Materials
- Cotton cord or yarn size #6 in colors: Light beige (A), Caramel/beige medium (B), Brown (C), White (D), and Black (E)
- Crochet hook 4.0–5.0 mm (adjust to your tension)
- Tapestry needle, pins, and scissors
- Anti-slip base spray or non-slip mat (optional, for the back)
- Tape measure and stitch markers
Suggested final size: ~ 95 × 65 cm (varies depending on yarn and tension)
Gauge (reference): single crochet with size 6 cotton cord and 4.5 mm hook, 10 cm ≈ 13 sc × 14 rows
Abbreviations (US terms)
- ch = chain
- sc = single crochet
- hdc = half double crochet
- dc = double crochet
- inc = 2 sc in the same stitch
- dec = 2 sc together
- rnd = round/row
- rep = repeat
All pieces are worked mostly in sc unless otherwise noted. Work in continuous rounds (do not join) using a stitch marker.
1) Oval Base of the Rug (color A – light beige)
- Foundation: ch 61.
- Row 1: starting from 2nd ch, work 58 sc, 5 sc in last ch to turn, 58 sc on the opposite side, 2 sc in first ch. (Total: 123 sc).
- Row 2: sc across; in each curve work increases: [inc, sc, inc, sc, inc]. (+12 sts).
- Rows 3–12: continue in oval, adding increases only in the curves, 6 increases per curve per round. Each round you add 1 more sc between increases.
- Stop when the base reaches ~95 × 65 cm.
- Finish the base: 1 round in hdc, then fasten off.
2) Pieces for the Mother Dog
2.1 Body (color B + C with patch)
- Body oval (B): ch 26, work oval for 7–8 rounds until ~38 × 28 cm. Fasten off with a long tail.
- Patch (C): ch 18, work oval for 5–6 rounds. Place it diagonally across the back.
2.2 Head (color B) and snout (color D)
- Head (B): ch 16, oval for 6–7 rounds (~20 × 16 cm).
- Snout (D): ch 12, oval for 3–4 rounds (~12 × 9 cm).
- Nose (E): magic ring, 6 sc, inc around (12), 1 rnd sc, fasten off.
2.3 Ears (2x – color B or C)
- ch 12, work oval for 4 rows. Add 1–2 short rows (back and forth) at the top to create the “droop”.
2.4 Paws (4x – D + black details E)
- Front paw: ch 10, oval for 3 rounds (~8 × 6 cm).
- Back paw: ch 12, oval for 3–4 rounds, flatten sides with decreases.
- Claws: embroider 3 stitches in black yarn.
2.5 Tail (B + fringe in D)
- ch 16, 2 rows of sc.
- Add white fringes at the tip.
3) Puppy Pieces (about 60% scale of mother)
- Body: ch 16, oval for 5–6 rounds.
- Patch: ch 10, oval for 3–4 rounds.
- Head: ch 10, oval for 4–5 rounds.
- Snout: ch 8, oval for 2–3 rounds.
- Nose: magic ring, 6 sc.
- Ears (2x): ch 8, 2–3 short rows for droop.
- Paws (4x): ch 8, oval for 2–3 rounds. Add claws.
- Tail: ch 12, 1–2 rows sc, add fringes.
4) Facial Embroidery
- With black yarn, embroider closed eyes: a curved line with 3–4 stitches and 2 small eyelashes.
- Add a mouth under the nose with a small curved line.
5) Assembly on the Base
- Place the bodies first, mother and puppy.
- Layer the heads, snouts, and patches; pin them in place.
- Sew pieces with invisible stitches.
- Attach ears only at the top so they hang loose.
- Add paws and tail last.
- Hide all yarn ends.
6) Border and Non-Slip Back
- Crochet 1 round of hdc around the entire rug, then 1 round of sl st to finish.
- Block lightly with steam.
- Apply non-slip spray or sew a non-slip backing.
7) Customization Tips
- Try different color palettes, such as gray + white + black for a modern look.
- Adjust size by adding or reducing rounds in the ovals.
- For tile floors, use thicker yarn (#8) for sturdiness.
Quick Recap
- Large oval base.
- Mother dog: body + head + snout + ears + paws + tail.
- Puppy dog: smaller body + head + details.
- Embroider eyes and mouth.
- Sew everything onto the base.
- Finish edges and add non-slip backing.