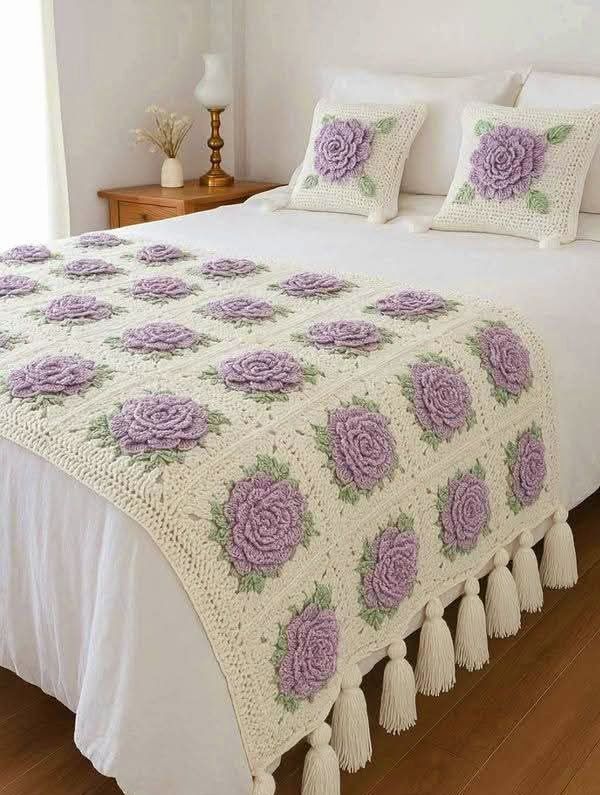
3D Rose Motif Blanket with Tassels – Step by Step
Floral crochet never goes out of style, and this blanket proves why. Plump layered roses bloom from every square, framed by soft cream and tender green leaves. The texture is luxurious yet the construction is simple: work one square at a time, join them, and finish with a playful tassel edge.
Because the blanket is modular, it’s wonderfully portable. Make a motif over coffee, another in the evening—before long you’ll have a garden of roses ready to assemble. The pattern is stash-friendly too: one ball of lilac for blooms, a little sage for leaves, and a neutral for backgrounds.
You’re in control of size and color. Keep it romantic in lilac and cream, or switch to blush, peach, or deep red. Squares can be joined into a bed runner (as pictured), a baby blanket, or a full throw—just add or subtract motifs.
Best of all, the rose is built right into the square, so there’s no sewing on appliqués. Three easy petal layers sit on chain “platforms” worked behind the previous round. If you can make chains, single crochet, and double crochet, you’ve got this.
Materials
- Worsted/#4 yarn: Lilac (flowers), Sage (leaves), Cream (background & joining).
Approx. for a 20-square runner: Lilac 200–250 g; Sage 100–150 g; Cream 600–700 g. - Hook 5.0 mm (or to meet gauge)
- Tapestry needle, scissors, blocking tools
- Optional: tassel maker or cardboard
Gauge (not critical): One finished square after blocking ≈ 6½ in / 16.5 cm.
Sizing ideas
- Bed runner (photo vibe): 3 × 7 squares (≈ 19½″ × 45½″ before border).
- Throw: 6 × 8 squares (≈ 39″ × 52″ before border).
Add or remove squares as needed.
Abbreviations (US)
ch chain • sl st slip stitch • sc single crochet • hdc half double crochet • dc double crochet • tr treble • sp space • st stitch • rep repeat • (…)= work in same sp.
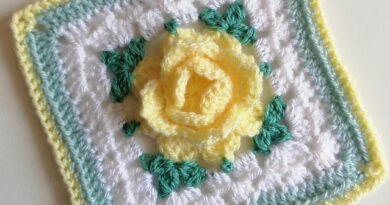
One 3D Rose Square
Round 1 – Center
With Lilac, MR, 12 dc into ring, join with sl st to first dc. (12)
Round 2 – Petal Base 1
Working in tops of R1: (sc, ch3) in each dc around, join in first sc. (12 ch-3 sps)
Round 3 – Petal Layer 1
In each ch-3 sp: (sc, hdc, 3 dc, hdc, sc). Join, do not fasten off.
Round 4 – Petal Base 2 (behind)
Working behind the petals: sl st to the base between any two petals, (ch4, sl st between next petals) around. (12 ch-4 sps)
Round 5 – Petal Layer 2
In each ch-4 sp: (sc, hdc, 4 dc, hdc, sc). Join.
Round 6 – Petal Base 3 (behind)
Again behind petals: (ch5, sl st between petals) around. (12 ch-5 sps)
Round 7 – Petal Layer 3 (largest)
In each ch-5 sp: (sc, hdc, 5 dc, hdc, sc). Join. Fasten off Lilac.
Round 8 – Leaf Frame (turn circle into a square)
Join Sage behind petals in any gap.
Work this sequence four times to form sides and corners:
Corner: in first sp (2 dc, ch2, 2 dc); Side: ch1, 2 dc in next sp, ch1; Side: 2 dc in next sp, ch1.
(You’ve used three petal gaps per side—corner, side, side.) Join. Fasten off Sage.
Round 9 – Background Granny
Join Cream in any corner.
Corners: (3 dc, ch2, 3 dc); Sides: 3 dc in each ch-1 sp. Join.
Rounds 10–11 – Grow to Size
Continue in cream with standard granny rounds to reach ≈6½″. Fasten off, weave ends, block lightly.
Join the Squares
Arrange squares. For a flat look, join-as-you-go on the final round: when you reach a side, replace each ch1 between side 3-dc groups with sl st into the corresponding space of the neighboring square; join corners with ch1, sl st into corner, ch1.
Alternatively, seam finished squares with whipstitch through the back loops.
Border
- Round A (Cream): sc evenly around, placing 3 sc in each corner.
- Round B: [dc, ch1, skip 1] across each side for a gentle lacy edge (3 dc, ch2, 3 dc in corners).
- Optional Round C: Reverse-sc (crab stitch) for a polished rope finish.
Giant Tassels (bed-runner look)
Make 12–16 tassels in cream. Wrap yarn around a 6–7″ piece of cardboard 40–50 times. Tie at the top, cut the bottom, wrap and secure the neck, trim even. Stitch tassels along one short edge (or both) spacing them every 2–3″.
Pillows to Match (quick notes)
Work two squares per pillow, join on three sides, insert pillow form, close final side with slip stitches or buttons. Add a slim cream border to reach your cushion size.
Care
Hand-wash or machine on gentle in a mesh bag; lay flat to dry. Block petals lightly to keep roses plump.
Enjoy your elegant garden-style blanket! If you’d like, I can turn this into a printable PDF with a color chart and a one-page motif diagram for your blog.