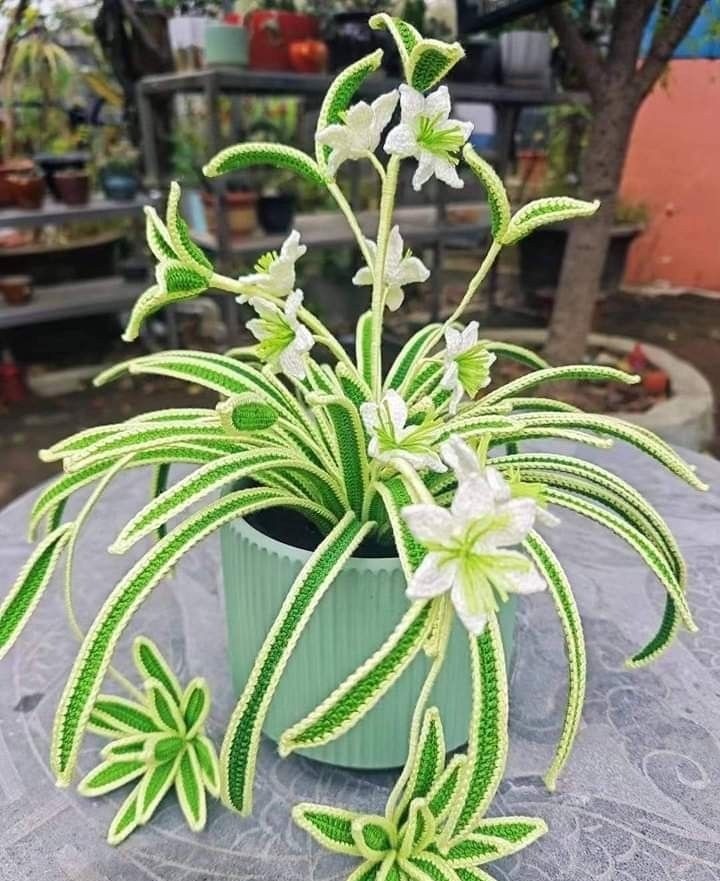
Crochet Spider Plant with Flowers – A Botanical Work of Art
When crochet meets botany, magical creations like this blooming spider plant come to life. Rich in detail and incredibly lifelike, this piece is perfect for decorating spaces with a touch of nature — without the need for watering! The long, arching leaves in vibrant green tones and delicate white flowers create an elegant and refreshing visual that feels just like a real plant.
This type of handcrafted project blends technique, patience, and artistic flair. It’s perfect as a gift, as a decorative item for homes or workspaces, or even for selling as a unique handmade piece. Let’s walk through the step-by-step process so you can make your own crochet masterpiece!
🧶 Materials Needed:
- Mercerized cotton yarn in light green, dark green, and white
- 1.75mm or 2.0mm crochet hook
- Thin floral wire (for shaping stems and leaves)
- Scissors
- Yarn needle
- Green floral tape (optional)
- Small pot (ceramic or plastic)
- Foam or filling material for the base
🌼 Skill Level: Intermediate to Advanced
🧵 Step-by-Step: Crochet Spider Plant with Flowers
1. Long Leaves (Green):
- Chain 55 with light green yarn.
- Work single crochet (sc) back along the chain.
- Switch to dark green and crochet around the edge with sc to give it a finished look.
- Insert a piece of wire into the leaf to allow shaping.
- Make 20 to 25 leaves to create a full plant.
2. Small Leaf Clusters (Baby Plants):
- Chain 15 with light green.
- Work sc, then edge with dark green.
- Create 5 small leaves and stitch them together at the base to form a cluster.
- These can be placed cascading down the pot, mimicking real spider plant pups.
3. White Flowers:
- Start with a magic ring using white yarn.
- Chain 2, then create 6 petals around the ring — each petal made of 3 double crochets and 1 chain at the top.
- Finish off and shape the petals gently.
- Make 7 to 10 flowers.
4. Stems and Assembly:
- Cover wire with green yarn (chain stitches) to create stems.
- Sew or glue flowers to the top of each stem.
- Gather several stems and bind them at the base with floral tape or stitching.
- Arrange the flower stems in the center of the pot and surround them with the large leaves.
5. Final Touches:
- Insert foam or stuffing inside the pot to hold everything in place.
- Use hot glue to secure leaves and stems.
- Bend and shape the wires to make the leaves and flowers look natural and flowing.
🌸 Bonus Tip:
You can lightly spray your finished flowers and leaves with fabric stiffener or starch to help them hold their shape longer, especially in humid environments.
💬 Conclusion:
This crochet spider plant is a true celebration of handmade artistry. It’s a beautiful fusion of color, texture, and creativity that brings a little joy and greenery to any room. Whether you’re crafting for yourself or gifting it to someone special, this project will surely become a cherished piece.
Let your hands tell a story — one stitch at a time.