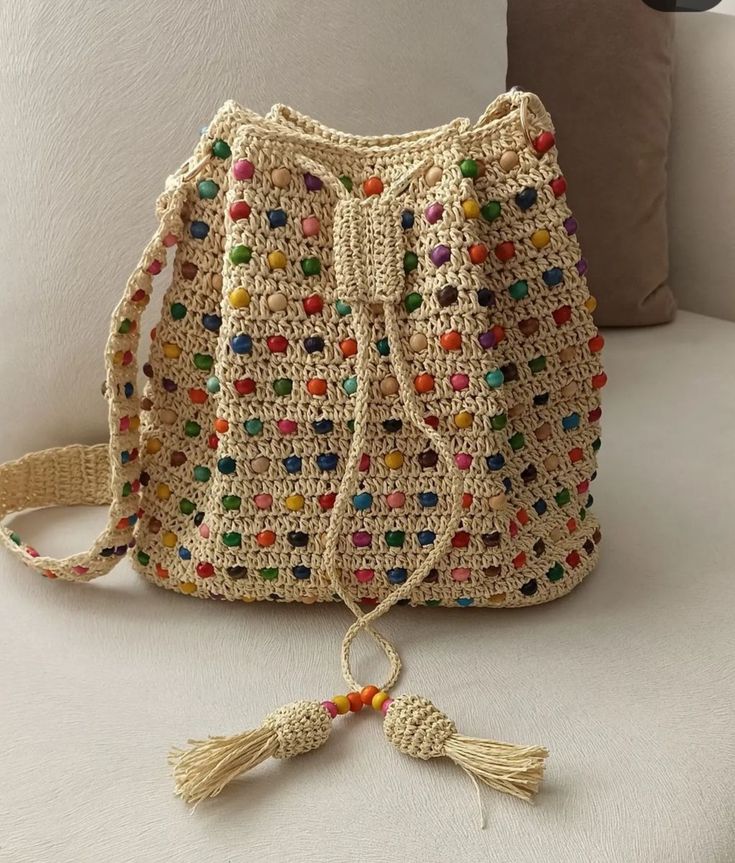
Colorful Beaded Crochet Bucket Bag: A Stylish and Fun Handmade Accessory
Handmade accessories have a special charm, and this colorful beaded crochet bucket bag is no exception. Its playful design, adorned with multicolored beads, makes it a versatile piece that can brighten up any outfit. Whether you’re going to the beach, running errands, or heading out for a casual lunch, this bag is sure to catch attention and bring a touch of joy to your look.
The combination of crochet stitches and beads creates a delightful texture and pattern, blending craftsmanship with creativity. The bucket bag style is both trendy and practical, offering plenty of space for your essentials while maintaining a lightweight and comfortable feel. The drawstring closure adds a bohemian vibe, making it a must-have for anyone who loves unique handmade fashion.
Perfect for gifting or adding to your own wardrobe, this project is a wonderful opportunity to experiment with colors, textures, and patterns. Beginners can take their crochet skills to the next level by incorporating beads, while experienced crafters will enjoy the meditative process of building the bag row by row.
In this tutorial, you’ll learn step-by-step how to create your own colorful beaded crochet bucket bag, from the base to the final decorative tassels. With some yarn, beads, and creativity, you’ll have a bag that’s as beautiful as it is functional.
Materials Needed
- 2 mm or 2.5 mm crochet hook
- Natural or beige cotton yarn (or your preferred color)
- Multicolored beads (medium size, smooth surface)
- Scissors
- Tapestry needle
- Stitch markers (optional)
Step-by-Step Instructions
1. Base of the Bag
- Begin with a magic ring and work 6 single crochets (sc) into it.
- Tighten the ring and join with a slip stitch (sl st).
- Continue working in the round, increasing evenly until you have a flat circle about 20 cm in diameter (or your preferred base size).
2. Building the Body
- Switch to working without increases to form the sides.
- To incorporate beads: before making a stitch, slide a bead close to the hook, then complete the stitch as usual. Alternate bead placement according to your desired pattern.
- Continue crocheting in rounds, alternating rows with and without beads to create a balanced design.
3. Shaping the Upper Part
- When the bag reaches about 25–30 cm in height, work 3 rounds without beads to form the top edge.
- Create spaces for the drawstring by chaining 2, skipping 1 stitch, and single crocheting into the next. Repeat around.
- Work 2 more rows of single crochet above the chain spaces.
4. Making the Strap
- Crochet a long strap (about 100–110 cm) using tight single crochet stitches for strength. Attach it securely to opposite sides of the bag.
5. Drawstring and Tassels
- Crochet a cord or chain long enough to pass through the top holes twice. Thread beads onto the cord as decoration.
- At each end, attach tassels: wrap yarn around your hand several times, tie off, and trim evenly. Add a bead above each tassel for a polished finish.
6. Finishing
- Weave in all loose ends with the tapestry needle.
- Check that all beads are secure.
- Block lightly if needed to shape the bag.