Lotus Moon Tile Square – Denna square
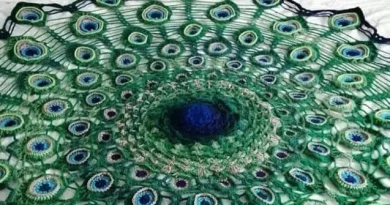
Crochet has a magical way of turning simple yarn into intricate works of art, and few patterns showcase this magic better than the Lotus Moon Tile Square. Inspired by the symmetry of nature and the serene beauty of lotus flowers, this square offers layers of texture, color, and movement. It’s a piece that feels almost meditative to create—and mesmerizing to look at.
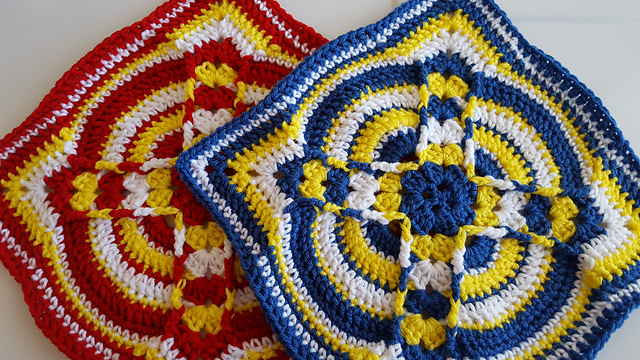
Each round of this square builds upon the last with delicate stitch variations that create blooming petals and soft geometric waves. The combination of bold color choices and textured stitches makes the Lotus Moon Tile ideal for projects that need a statement piece, like a feature blanket, a wall hanging, or a luxurious pillow cover.
What sets this square apart is its blend of structured form and free-spirited creativity. You can stick to deep, moody colors for an earthy effect, or burst into brights for a boho-chic vibe. Either way, each completed square feels like a celebration of patience, rhythm, and vibrant artistry.
Ready to start crocheting your own Lotus Moon Tile masterpiece? Here’s a simple guide to walk you through this rewarding project step-by-step!
🧶 Materials Needed:
- Worsted weight yarn in at least 5–7 different colors
- 5.0 mm (H-8) crochet hook
- Yarn needle for weaving in ends
- Scissors
- Stitch markers (optional for complex rounds)
🪡 Step-by-Step Instructions:
1. Foundation:
- Start with a magic ring.
- Round 1: Ch 3 (counts as dc), work 11 more dc into the ring. Sl st to join (12 dc total).
2. Center Petal Rounds:
- Round 2: Change color. Ch 2, puff stitch into next st, ch 2, sl st into next st. Repeat around to form puffy petals.
- Round 3: Change color. Work sc and dc stitches to shape the base for the next layer of petals.
3. Expanding Circles:
- Round 4-6: Continue layering with dc and hdc stitches, alternating colors as desired. Use front post double crochet (FPdc) to create texture and defined ridges between rounds.
4. Square Formation:
- Round 7: Begin squaring off the circle by strategically placing (dc, ch 2, dc) into designated corners while maintaining the rounded structure along the sides with sc and hdc stitches.
5. Outer Framing and Texture:
- Round 8+: Add additional rounds with dc and sc stitches. Use front post and back post stitches to emphasize dimension and depth.
- Add final border rows in a bold or contrasting color for a striking finish.
6. Final Touches:
- Fasten off and weave in all loose ends securely.
- Block the square gently to ensure perfect edges and enhance the stitch definition.
✨ Project Ideas:
- Join multiple squares for a mesmerizing blanket.
- Use a single square for a vibrant pillow cover.
- Frame one finished square as a standalone wall art piece!