Sunshine & Petals: How to Make a Whimsical Daisy Pinwheel Quilt
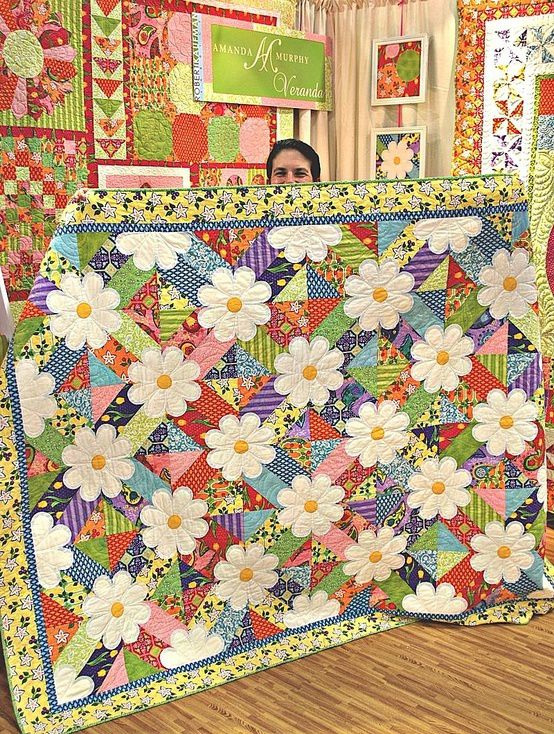
There’s something truly magical about the way quilting brings color, texture, and joy together — and this Daisy Pinwheel Quilt is the perfect embodiment of that magic. Overflowing with cheerful hues, playful movement, and nostalgic charm, this quilt is not just a functional piece — it’s a joyful experience. Whether you’re crafting it as a gift, a décor centerpiece, or a cozy personal keepsake, it promises to brighten your heart and your home.
This delightful design combines traditional piecing with appliqué, allowing quilters to explore both structure and creativity. The spinning pinwheel blocks create dynamic visual motion, while the large daisy appliqués soften the overall look, adding a whimsical, garden-like feel. It’s the kind of quilt that makes people smile the moment they see it.
Perfect for spring and summer projects — or for bringing warmth and color into gray seasons — this quilt is suitable for confident beginners and experienced quilters alike. Its versatility allows you to play with prints, experiment with appliqué techniques, and embrace bold color combinations that reflect your personal style. Whether draped over a couch, hung as wall art, or used in a nursery, the Daisy Pinwheel Quilt is a conversation piece in any space.
Ready to bring a burst of sunshine to your sewing room? Let’s begin!
✂️ Materials Needed:
- Assorted fat quarters or fabric scraps in bright colors and prints
- White fabric (for daisy petals)
- Yellow fabric (for daisy centers)
- Fusible web or fabric glue
- Backing fabric and batting
- Coordinating thread for piecing and appliqué
- Rotary cutter, cutting mat, and ruler
- Sewing machine and iron
- Appliqué scissors or small fabric scissors
🧵 Step-by-Step Instructions:
1. Cut the Pinwheel Blocks
Choose four different fabrics for each pinwheel block. Cut two triangles from each fabric, arrange them into a spinning layout, and stitch them into square blocks. Press well and trim to uniform size (e.g., 10″ x 10″).
2. Assemble the Quilt Top
Arrange all your pinwheel blocks into rows. Vary the fabric combinations to keep the layout fun and balanced. Sew the blocks into rows and then join the rows to complete your quilt top.
3. Create the Daisy Appliqués
Using petal-shaped templates, cut daisies from white fabric. You’ll need 6–8 petals per flower. For the centers, cut small circles from yellow fabric. Apply fusible web to the backs of each piece.
4. Position and Fuse the Flowers
Lay the petals over your pieced top, overlapping corners of blocks for a playful effect. Arrange the yellow centers, then fuse or glue everything in place using your iron.
5. Appliqué the Flowers
Stitch around each petal and center using a zigzag, blanket, or free-motion stitch. This step secures the flowers and adds decorative texture.
6. Add Borders
Choose a fun border print and sew around all sides of the quilt top. Consider a wide floral border or pieced corners for added flair.
7. Quilt and Bind
Layer your quilt top, batting, and backing to form a quilt sandwich. Use your preferred quilting style: echoing the flowers, swirling across pinwheels, or outlining the blocks. Finish with binding fabric to match or contrast.
🌼 Final Thoughts
This Daisy Pinwheel Quilt is more than a cozy blanket — it’s a celebration of life, color, and creativity. It’s the kind of project that fills your space with happiness, your hands with purpose, and your heart with pride. Handmade quilts carry stories, and this one will surely become part of yours or someone else’s joy-filled memories.
Don’t be afraid to make it your own — experiment with floral themes, pastel palettes, or even scrappy combinations for a unique twist. Most of all, have fun and let your creativity bloom one stitch at a time.