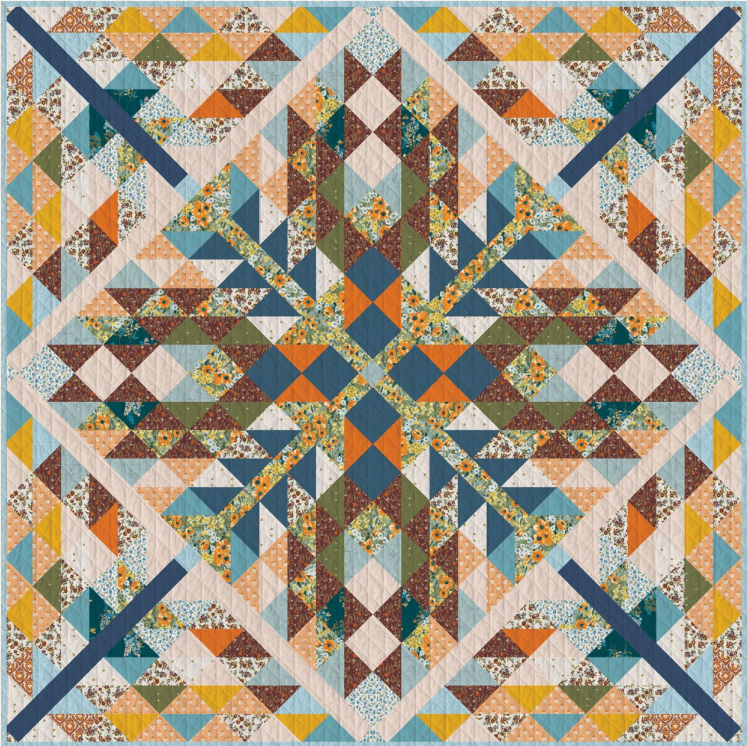
Retrospection Quilt: How to Make This Classic Quilting Pattern
The Retrospection Quilt is a project that combines traditional patchwork techniques with a vintage aesthetic. This quilt pattern consists of classic quilt blocks arranged in a structured design that evokes a sense of nostalgia while remaining versatile and customizable.
In this tutorial, we’ll go through the necessary materials, quilting techniques, and step-by-step instructions to help you create your own Retrospection Quilt.
Materials Needed
Before starting, gather the following materials:
- Cotton fabric – Choose various prints and colors to create contrast in your quilt blocks.
- Quilt batting (filling) – Adds thickness and warmth to the quilt.
- Backing fabric – A solid or patterned fabric for the back of the quilt.
- Sewing thread – Select a thread that matches or contrasts with your fabrics.
- Sewing machine – For piecing and quilting.
- Quilting ruler and cutting mat – To ensure precise fabric measurements.
- Rotary cutter or fabric scissors – For cutting fabric pieces.
- Pins or quilting clips – To secure layers of fabric before sewing.
- Iron and ironing board – For pressing fabric pieces during assembly.
Step-by-Step Guide to Making a Retrospection Quilt
1. Choosing the Quilt Design and Fabric
- Decide on a color scheme and fabric prints for your quilt. A combination of solids, florals, and geometric patterns works well for a vintage effect.
- Determine the quilt size (e.g., lap quilt, twin-size, queen-size) and calculate how many blocks you’ll need.
2. Cutting the Fabric Pieces
- Using a quilting ruler and rotary cutter, cut fabric into squares or rectangles based on your chosen quilt block pattern.
- A common size for quilt blocks is 10×10 inches, but you can adjust the dimensions according to your design.
- Cut additional fabric for the quilt borders if you plan to add them.
3. Assembling the Quilt Blocks
Arrange the fabric pieces to form the patchwork design before sewing.
- Sew the fabric pieces together using a ¼-inch seam allowance, pressing the seams flat with an iron as you go.
- Repeat this process until you have assembled all the quilt blocks.
4. Sewing the Quilt Top
- Lay out your quilt blocks in a visually appealing arrangement.
- Sew the blocks together in rows, then join the rows to form the quilt top.
- Press all seams open for a smooth, professional finish.
5. Adding Borders (Optional)
- If desired, cut and sew fabric strips around the edges of the quilt to create a border.
- Borders help frame the quilt and provide extra stability.
6. Preparing the Quilt Layers (Quilt Sandwich)
- Cut the batting and backing fabric so they are slightly larger than the quilt top.
- Lay the backing fabric flat, place the batting on top, and position the quilt top on the very top.
- Smooth out any wrinkles and secure the layers with pins or basting spray.
7. Quilting the Layers Together
- Quilt the layers together by stitching along the seams of the quilt blocks or creating a decorative pattern.
- You can use a walking foot on your sewing machine to help guide the fabric smoothly.
- If quilting by hand, use small, even stitches to ensure durability.
8. Trimming and Binding the Quilt
- Trim any excess batting and backing fabric so that all layers are even.
- Cut fabric strips to make a binding (2.5-inch wide strips work well).
- Attach the binding around the edges of the quilt, folding it over to enclose the raw edges.
- Sew the binding in place using a straight stitch or hand stitching for a neat finish.
Final Touches and Care Tips
- Press the finished quilt to give it a crisp appearance.
- Wash gently using a delicate cycle or hand wash to maintain fabric quality.
- Store properly in a dry space, folded lightly to prevent deep creases.
Conclusion
The Retrospection Quilt is a rewarding sewing project that blends vintage charm with practical quilting techniques. By following these step-by-step instructions, you can create a quilt that is both visually appealing and functional.
Now that you have the guide, it’s time to start your project! Gather your materials, set up your sewing space, and enjoy the process of making a timeless quilt. Happy quilting!