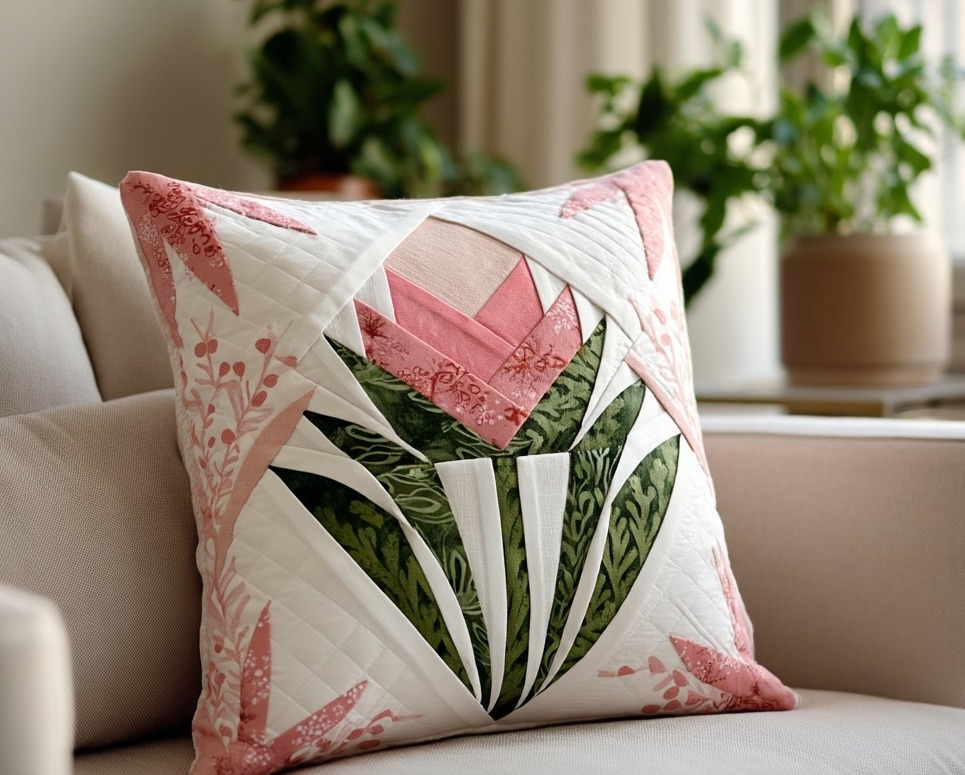
Modern Floral Paper-Pieced Pillow – Step by Step
A statement pillow is the quickest way to freshen a room, and this design delivers high impact with minimal yardage. Crisp green leaves, soft pink petals, and a creamy background create a clean, botanical look that feels both modern and timeless. Set on point, the motif reads like a stylized tulip framed inside a diamond.
The secret behind those razor-sharp angles is foundation paper piecing (FPP). Paper piecing lets you sew perfect points without advanced cutting or tricky templates. If you’ve never tried FPP, this is a great first project: the sections are large, the seams are straight, and the final cushion is incredibly satisfying.
Color is where this pillow shines. Mix one or two dark greens for depth in the leaves, pair blush and coral pinks for the petals, and keep the background light so the shape pops. Prints with subtle texture (tiny florals, tone-on-tones) add interest without overpowering the block.
We’ll piece the floral block, set it on point with background triangles, quilt it, and finish with an envelope or zipper back. The instructions make an 18″ pillow cover, but you can scale the templates to any size you like.
Materials (for one 18″ pillow)
- Fat quarters: 2–3 greens, 2 pinks, background (off-white)
- Backing for pillow: ½ yd (or two fat quarters for envelope back)
- Batting: ~20″ square
- Optional binding: ⅜ yd (if you want a bound edge)
- 18″ pillow insert
- Printer & paper (for templates), glue stick or tape
- Basic quilting tools: rotary cutter, mat, ruler, iron
- Sewing machine with ¼″ foot; thread to match
- FPP basics: shorter stitch length (1.6–1.8 mm), paper scissors
Don’t want to FPP? Use freezer-paper FPP or the “add-a-quarter” ruler—whichever you find friendliest.
Cutting & Template Prep
- Print templates at 100% (one flower made of four sections: A & B = leaves, C & D = petals). Each template already includes a ¼″ seam allowance.
- Rough-cut around each template, leaving a ⅜–½″ paper margin.
- Pre-cut fabric as generous rectangles that cover each numbered area:
- Leaf pieces: (6) rectangles about 3″ × 5″ and (4) about 2½″ × 4″.
- Petal pieces: (6) rectangles 3″ × 4½″.
- Background slivers/triangles: assorted 3″ × 4″ rectangles.
(Oversize pieces make FPP stress-free—trim later.)
Step-by-Step Piecing
A. Paper-Piece the Leaves (Sections A & B)
- Place fabric 1 (leaf) RS up on the back of Section A covering piece A1.
- Position background fabric for A2 RS down; stitch on the A1–A2 line with a short stitch length.
- Flip, press, and trim the new edge with a ¼″ seam allowance.
- Continue in numeric order until Section A is complete; repeat for Section B.
- Trim on the outer dashed line of each section.
B. Paper-Piece the Petals (Sections C & D)
- Repeat the same process using pinks for the petals and background for spacers.
- Trim sections to the outer dashed line.
C. Join the Flower
- Sew A to C and B to D, matching paper edges and seam intersections with pins.
- Sew the two halves together to complete the floral block.
- Carefully tear away the papers (short stitches make removal easy).
- Press seams open for a flat top.
D. Set the Block on Point
- Trim the floral block to 12½″ square.
- From background fabric, cut (2) 9″ squares. Slice each once on the diagonal for 4 setting triangles.
- Sew one triangle to each side of the block (bias edge to block side); press toward triangles.
- Add the remaining two triangles to top/bottom.
- Square the top to 18½″ × 18½″.
Quilting
- Make a quilt sandwich: backing (wrong side up), batting, pillow top (right side up).
- Baste with spray or pins.
- Quilt as desired:
- Echo quilting ¼″ from major seams around petals and leaves.
- A simple diagonal grid across background areas.
- Trim back to 18½″ square after quilting.
Pillow Back (two options)
Envelope Back (quick)
- Cut (2) 18½″ × 13″ rectangles.
- On one long edge of each, fold ½″ twice and stitch to hem.
- With the quilted front RS up, place the two back pieces RS down, hemmed edges overlapping at center.
- Stitch around the perimeter with a ¼″ seam. Turn right side out, poke corners, insert pillow.
Zipper Back (sleek)
- Cut (2) 18½″ × 10½″ rectangles.
- Install a 16–18″ zipper between the long edges.
- Place the zipped back RS down on the front, stitch all around, turn, and insert pillow.
Optional: Bind the outer edge like a mini quilt for a framed, tailored look. Use 2¼″ strips joined to length.
Tips & Variations
- Starch fabrics before FPP to tame bias edges and get crisp points.
- Swap pinks for oranges or plums for a fall flower; try indigo and emerald for a dramatic version.
- Scale templates to 110% for a 20″ cover or to 85% for a 16″ pillow.
- Add hand-stitched accents (big-stitch quilting in the petals) for extra texture.