Christmas Tree Quilt: A Festive Patchwork Project
The holiday season is a time filled with warmth, creativity, and handmade treasures. Quilting during this period becomes even more special, as each stitch carries the joy and anticipation of Christmas. One of the most beloved seasonal projects is the Christmas Tree quilt, a design that combines tradition, color, and festive cheer. Whether you’re decorating your home or making a thoughtful handmade gift, this quilt block is sure to brighten any space.
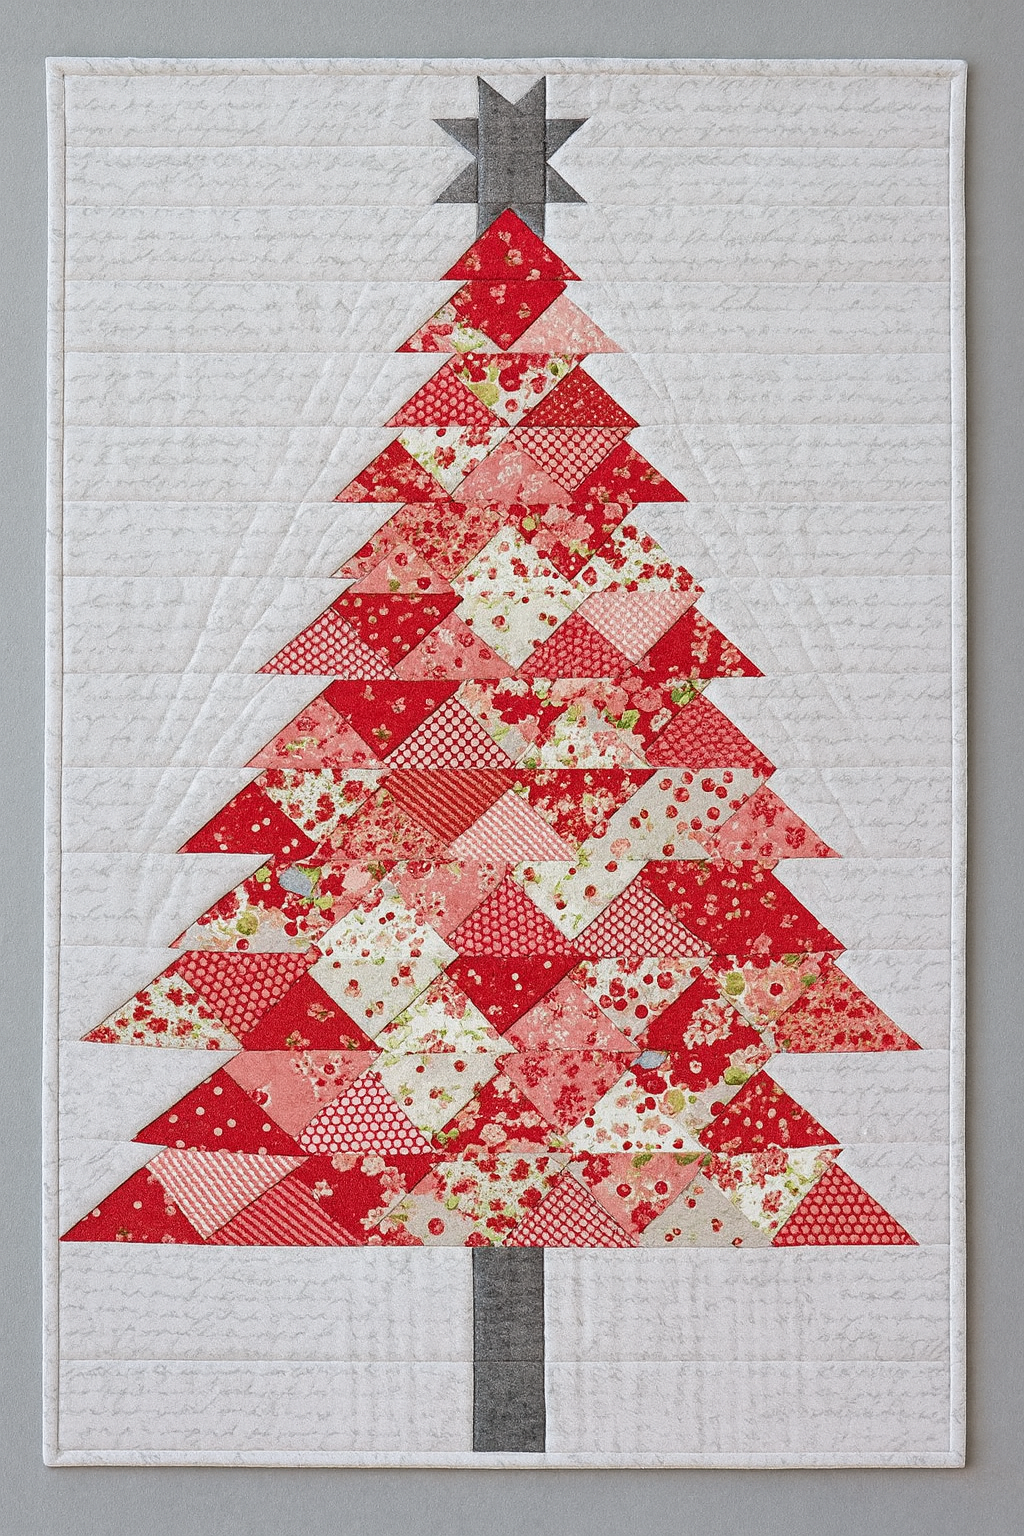
This quilt project is perfect for quilters of all levels. Its simple geometric shapes—triangles and squares—come together to form a striking Christmas tree pattern that is both modern and timeless. With just a selection of red, white, and festive fabrics, you can create a quilt block that captures the holiday spirit in every detail. The design also allows for versatility, making it easy to adapt into table runners, wall hangings, or even a full quilt.
What makes this quilt so captivating is the mix of prints and tones. By blending florals, polka dots, stripes, and solids, the Christmas Tree gains texture and depth. Each fabric choice adds character, making your quilt completely unique. The red-and-white palette reflects the classic Christmas look, while the soft patterns create a cozy, handmade charm that feels inviting and joyful.
In this tutorial, we will walk through each step to recreate this festive design. From cutting your fabric pieces to assembling the blocks and adding finishing touches, you’ll have clear instructions to follow along. By the end, you’ll have a beautiful Christmas Tree quilt block that you can incorporate into your holiday projects. Let’s get started!
Materials Needed:
- Red and white cotton fabrics in different prints (floral, polka dots, stripes, solids).
- Neutral background fabric (white or light gray with subtle patterns).
- Rotary cutter, ruler, and cutting mat.
- Sewing machine with matching thread.
- Iron and pressing board.

Step-by-Step Instructions:
Step 1: Cutting the Fabric
- Cut red fabrics into 4.5-inch squares.
- Cut each square diagonally once to create half-square triangles (HSTs).
- Cut white background fabric into matching 4.5-inch squares, and cut diagonally as well.
Step 2: Making the Half-Square Triangles
- Pair one red triangle with one white triangle, right sides together.
- Sew along the diagonal edge with a 1/4″ seam allowance.
- Press seams open and trim to square (approximately 4″ x 4″).
Step 3: Assembling the Christmas Tree
- Lay out your HSTs in rows to form a large triangle, starting with one at the top and increasing as you go down.
- Add extra white background squares at the sides to create a clean edge.
- Use a gray fabric strip at the bottom to represent the tree trunk.
Step 4: Sewing the Rows Together
- Sew each row of triangles together, carefully pressing the seams.
- Join the rows from top to bottom, ensuring that points align.
- Press the final piece well to set the seams.
Finishing Ideas:
- Use this quilt block as a table runner centerpiece by repeating the pattern in a row.
- Turn it into a festive wall hanging by adding borders and quilting stars around it.
- Expand into a full quilt by creating multiple tree blocks and arranging them in a forest layout.


