Butterfly Crochet Rug
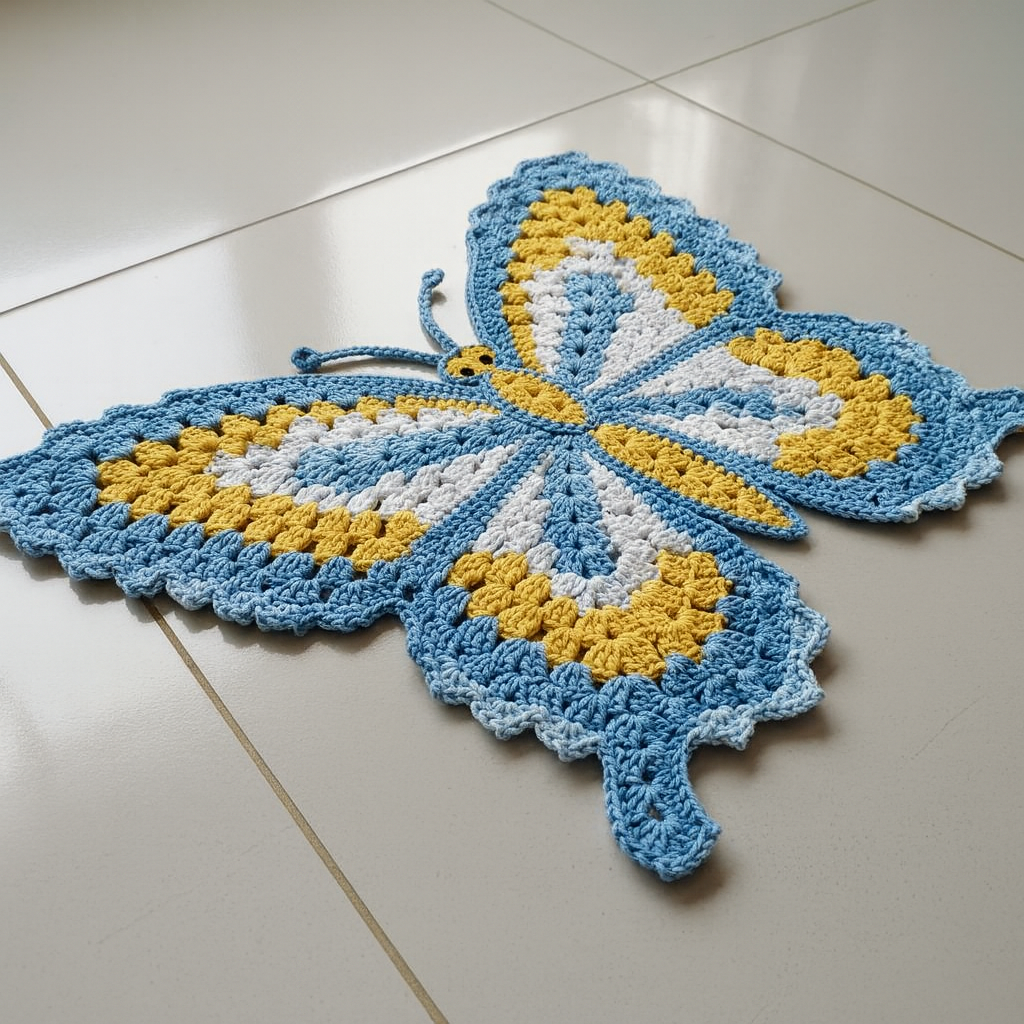
Crochet rugs bring warmth, creativity, and charm to any home, but nothing compares to the beauty of a butterfly design. This butterfly crochet rug is a statement piece that combines artistry with practicality. Its bold shape and vibrant colors add a playful yet elegant touch to any space, making it perfect for bedrooms, nurseries, or even living areas that need a unique handmade accent.
The butterfly motif is not only visually stunning, but it also represents transformation and beauty, making this rug a meaningful addition to your home. The use of soft yarn ensures comfort underfoot, while the bold edges and layered stitches create depth and definition in the wings. This pattern allows you to experiment with different color combinations, giving you the opportunity to customize your rug to match your decor.
This project is suitable for intermediate crocheters who are comfortable with basic stitches and shaping. However, with a bit of patience, adventurous beginners can also take on this project and learn along the way. The rug works up beautifully using granny-style clusters and shells, which are pieced together to form the butterfly’s iconic wings and body.
By following this step-by-step guide, you’ll not only create a functional rug but also an artwork that reflects your love for crochet. The finished piece is eye-catching and sure to impress anyone who steps into your home. Let’s begin crafting this butterfly crochet rug together and turn simple yarn into a magical, handmade treasure.
Step-by-Step Instructions
Materials Needed:
- Worsted weight cotton yarn in three colors (main, accent, and border)
- Crochet hook suitable for your yarn size
- Scissors
- Yarn needle for weaving ends

Step 1: Create the Body
Start by making a long oval shape for the butterfly’s body using double crochets. This will serve as the center foundation where the wings will attach. Work in continuous rounds to create a firm, slightly thick body.
Step 2: Make the Wings
Crochet granny-style clusters (3 dc groups) to form triangular sections. Work two large wings at the top and two smaller wings at the bottom. Each wing is built outward in rows, expanding with chain spaces and shells to form the scalloped edge.
Step 3: Attach and Shape
Position the wings evenly on either side of the body. Use slip stitches or sew them in place with a yarn needle. Continue to add edging around the entire butterfly using single crochets and picots to highlight the details and strengthen the border.
Step 4: Finishing Touches
Add small details like the butterfly’s antennas with chains and slip stitches. Weave in all yarn ends neatly and block the rug to ensure the wings lie flat and the shape stays defined.
✨ Now you have a soft, decorative butterfly crochet rug that will brighten any room with its beauty and charm.


