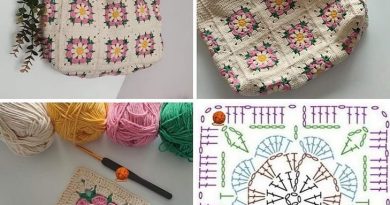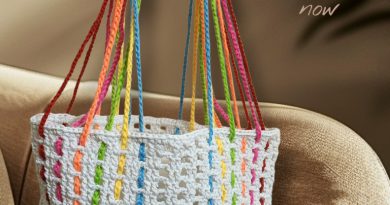
How to Make a Crochet Bag Strong Enough for Everyday Use: Step-by-Step Durability Guide
If you’ve ever spent hours crocheting a bag, only to watch the straps stretch or the top lose shape after a trip to the store, you know how disappointing it is. You pick your favorite yarn, enjoy the process, and then the bag just can’t keep up with daily life—whether you’re carrying a book, groceries, or your kid’s water bottle.
The answer to making a crochet bag strong enough for everyday use is to choose a dense worsted cotton or cotton blend yarn with a 4–5 mm hook, reinforce both the lining and the handle joins, and focus on stitches that help the bag keep its shape. With the right steps, your bag will carry real weight and still look great, so you can actually use it every day instead of letting it sit unused.
The yarn you pick makes all the difference in how your bag holds up. If you want your bag to keep its structure and not look tired after a month, use a sturdy worsted-weight cotton or cotton blend. These yarns give you a fabric that stands up to daily bumps and doesn’t stretch out.
A 4–5 mm hook is ideal. This size keeps your stitches tight enough for support but leaves just enough stretch for comfort.
I once tried making a tote with a bigger 6 mm hook and a soft acrylic yarn, hoping for a slouchy look. Instead, the result was a floppy bag that sagged with anything heavier than a notebook.
Dica importante: Always make a small swatch with your chosen yarn and hook. Stretch and twist it a bit—if it springs back, you’re good. If it stays stretched, try a smaller hook or use a firmer cotton yarn.
How Can You Stop Bag Edges from Sagging?
The opening of a crochet bag is where sagging usually starts. If you’ve lined a bag and seen the top edge droop within a week, you know how fast it can happen.
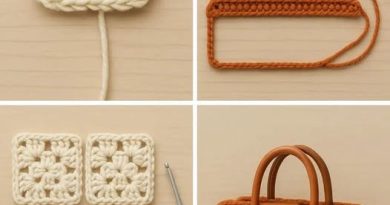
To prevent this, start your bag with foundation single crochet (FSC) or a chain followed by single crochet. Both methods create a base that resists stretching, so the top stays crisp for adding a lining or hardware.
A reinforced edge means your bag won’t lose its shape every time you fill it. I was hesitant to spend extra time on FSC, but after seeing my bags keep their structure—no more droopy openings—I use it for every project now.
When you sew in the lining, attach it just under the crochet edge with a slip stitch. This method anchors the lining and helps the bag keep its structure where it counts.
A solid lining is what makes the difference between a cute crochet bag and one you can rely on. Cut the lining about 90–95% of the bag’s finished height. That little bit of space lets the lining move with the bag, instead of pulling or bunching.
Before attaching, fold the lining’s top edge under by about 1.5 cm. This gives a neat finish and adds strength right where the bag needs it.
Sew the lining to the bag just below the crochet edge using a slip stitch. The result is a nearly invisible, but very strong, join that holds up even when the bag is full.
If you want to add pockets or interfacing, do it before sewing the lining into place. Once it’s all assembled, the lining acts like a second layer, spreading the weight and helping your crochet keep its shape day after day.
Resumo rápido: Stopping the lining just before the top and folding the edge before sewing keeps your bag looking clean and keeps daily wear from undoing your effort.
Handles are usually the first part of a crochet bag to show wear, especially if you’re someone who tosses bags over your shoulder without thinking. The stitch and construction both matter. Tunisian knit stitch (TKS) is about 30% stronger lengthwise than the standard Tunisian simple stitch.
TKS creates a dense, rope-like fabric that won’t stretch out, even after months of use. Once I switched to TKS for my own bags, I noticed the handles held up much longer—bags I’d made with regular stitches started to fray or stretch quickly.
You don’t have to be a Tunisian crochet expert. After a little practice, most people can handle TKS. That one change can make a big difference in how long your handles last.
How Do You Anchor Handles So They Don’t Rip Out?
Even the strongest handle won’t last if it’s attached to a weak spot. If you sew handles to soft fabric or thin yarn, they’ll pull loose the first time you load up the bag. To prevent this, reinforce the join with triple-layer linen patches about 3" by 1.5", then crochet three rounds of single crochet through all the layers—yarn, linen, and bag.
This creates a rock-solid anchor, tested to withstand about 1,280 psi of pulling force. That means your bag can handle heavy loads without the seams splitting or the join tearing.
When you attach the handle, use a saddle stitch with seven stitches on each side. Handles cut to 22" before attachment (which gives an 11" drop) and secured like this can take a pull force of up to 45 lbs—plenty for groceries, books, or whatever you need to carry.
Dica importante: Take your time when reinforcing handle joins. Spending ten extra minutes now saves hours of repairs later, and you won’t have to worry about handles popping off unexpectedly.
How Long Should Handles Be for Daily Bags?
Choosing the right handle length and attaching them well matter just as much as the materials you use. For everyday bags, handles that are 22" before attachment (for an 11" drop) are the most comfortable for carrying by hand or on your shoulder.
Use a saddle stitch with seven stitches per side when attaching. This spreads the weight and keeps the fabric from tearing at any one point. I found this out the hard way after making a bag with thin, poorly attached handles; after just one trip to the store, the stitches started to come loose.
If you plan to carry heavier things, always use triple-layer linen patches and crochet through all layers when attaching the handles. This combination gives you a join that’s as sturdy as any store-bought bag.
Cotton yarn is the top choice for sturdy bags, but it shrinks a bit when wet-blocked—usually around 3–5%. If you skip this step, your finished bag might shrink after the first wash, or the lining could bunch up and look uneven.
Always make a gauge swatch and wet-block it before starting your bag. This shows exactly how much the yarn will shrink, so you can size the bag and lining with confidence.
If your bag uses a fabric lining, pre-wash and press the lining fabric too. That keeps your bag looking sharp and prevents the lining from poking out after washing. From experience, skipping the pre-wash almost always means ending up with a bag that looks lumpy and off after a few uses.
Resumo rápido: Pre-washing and blocking aren’t just for perfectionists—they’re the easiest way to make sure your finished bag looks and fits the way you planned.
Ready to Make a Bag You Can Actually Use Every Day?
When you use these steps—choosing firm yarn and the right hook, reinforcing the edges, lining carefully, and building strong handles—you get a crochet bag that’s ready for anything. No more sagging, no more broken stitches, no more scrambling to fix it before you leave the house.
What would you put in your new, sturdy crochet bag first? Or have you had a bag project go wrong—maybe a handle that didn’t hold up, or a lining that never sat right? Share your story or question below—I’d love to hear what worked, what didn’t, or help you troubleshoot your next bag.