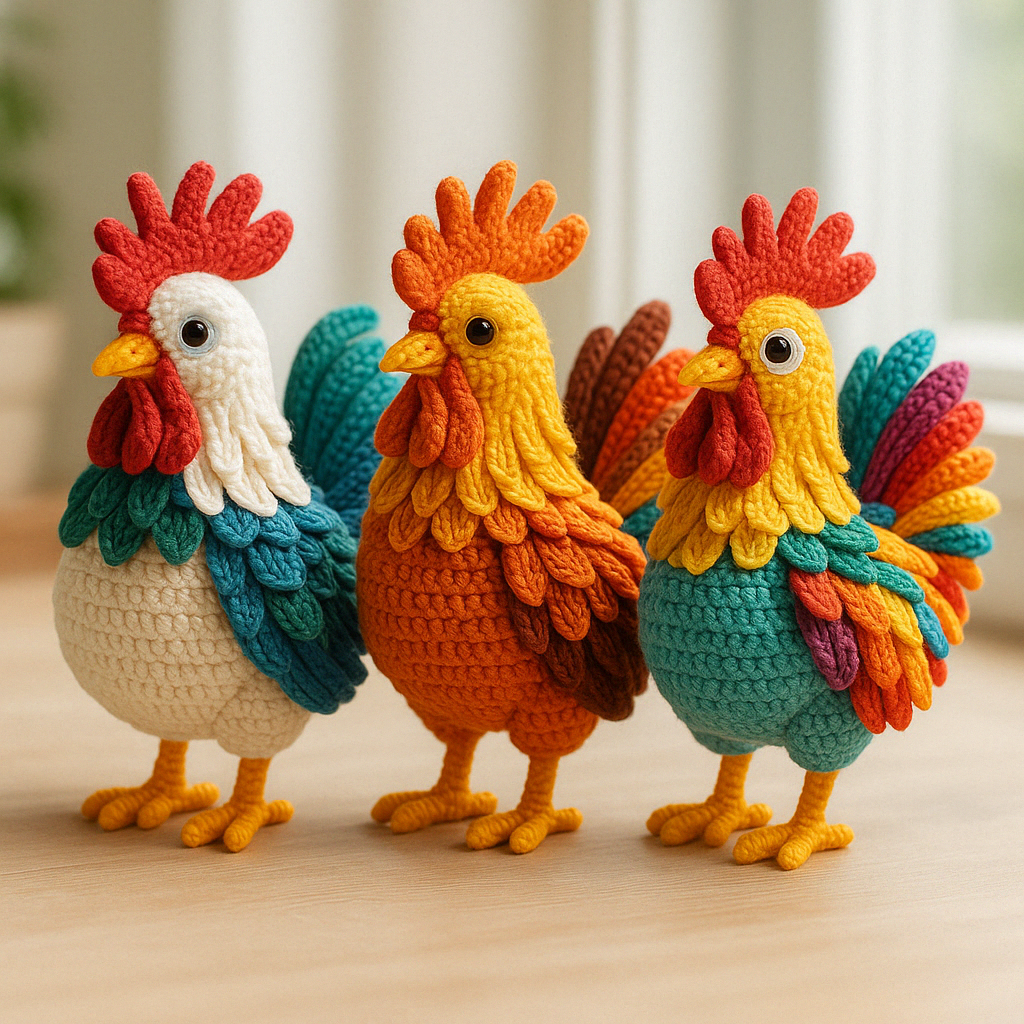
🐓 Crochet Rainbow Rooster Amigurumi – Free Pattern & Step-by-Step Tutorial
If you love vibrant amigurumi and want to add a splash of color and joy to your handmade collection, this Rainbow Rooster Amigurumi is the perfect project for you! Ideal as a cheerful home décor item, a children’s toy, or a craft fair showstopper, this rooster combines fun stitches with bold colors to bring a smile to anyone’s face.
✨ Why Make a Rooster Amigurumi?
The rooster is a symbol of joy, new beginnings, and confidence. In many cultures, it’s considered a sign of strength and protection. Bringing this character to life in yarn form is not just fun but also meaningful. Whether it’s for a seasonal decoration, a handmade gift, or a centerpiece for your Easter table, this rooster is sure to impress.
Crocheting animals helps develop key skills like:
- Shaping and sculpting with yarn
- Working with color changes
- Stuffing and finishing techniques
Plus, it’s incredibly rewarding to see your yarn transform into a 3D character with personality!
🎯 Skill Level: Intermediate
You’ll need to be comfortable with basic amigurumi techniques and confident working with color changes.
💼 Materials
- DK or worsted weight cotton or acrylic yarn in multiple colors:
- White (body)
- Red, orange, yellow (comb, wattle, beak, and feather tips)
- Green, teal, blue, purple (feathers and tail)
- 2.5mm or 3mm crochet hook
- Fiberfill stuffing
- Safety eyes (8mm)
- Yarn needle
- Stitch marker
- Scissors
- Optional: craft wire to shape tail feathers
📋 Abbreviations (US Terms)
- MR = Magic Ring
- ch = chain
- sc = single crochet
- inc = increase (2 sc in 1 st)
- dec = decrease (sc 2 sts together)
- sl st = slip stitch
- st = stitch
- BLO = back loop only
🪡 Instructions
🐔 Body
With white yarn:
- Rnd 1: MR, 6 sc [6]
- Rnd 2: inc x6 [12]
- Rnd 3: (sc, inc) x6 [18]
- Rnd 4: (2 sc, inc) x6 [24]
- Rnd 5: (3 sc, inc) x6 [30]
- Continue increasing until you reach 60 sts.
- Work even (sc around) for 10-12 rounds.
- Begin decreasing (mirror of increase rounds).
- Stuff firmly before closing.
🐣 Comb & Wattle (Red)
Comb:
- Ch 9, sl st in 2nd ch, (sc, hdc, dc) in next, skip 1 ch, repeat pattern, finish with sl st.
Wattle:
- Make 2 small ovals: MR, 6 sc, join, ch 1, turn, inc around.
🐤 Beak (Yellow)
- MR, 4 sc
- Continue in spiral for 3-4 rounds.
- Slightly stuff, sew to face.
🦉 Eyes
- Place 8mm safety eyes or embroider eyes using black yarn.
- Attach securely 4 rounds down from the top center.
🪽 Wings (Various colors)
Make two:
- Ch 9, sc across
- Row 2-6: Work up and down, shaping feathers with short rows or decreasing at the ends.
- Attach to sides of the body.
🪶 Tail Feathers
Make 5–7 feathers in different colors:
- Ch 15–20
- Work back with sc, hdc, dc to create texture
- Slightly curve using increases/decreases
- Sew to back in a fan shape
🐓 Legs (Yellow)
Make 2:
- MR, 6 sc
- Continue in spiral, increase and decrease for shape
- Make toes separately and sew on
- Attach firmly to base of body
✨ Finishing Touches
- Add light blush to cheeks using embroidery or fabric paint
- Weave in all ends
- Adjust posture so rooster stands upright
🏡 Display Ideas
- Use as Easter or spring décor
- Pair with eggs or chicks for a farm theme
- Great gift for crochet lovers or kids
📝 Final Notes
This rooster is highly customizable — change the color palette for seasonal versions (like a Christmas rooster!), or use pastel tones for a baby gift. With a few hours and a bit of yarn, you’ll have a joyful companion full of personality and charm.
🧵 Community Tip
Don’t forget to tag your finished project with #RainbowRoosterCrochet so others can see your beautiful version! Sharing is part of the joy.
Happy crocheting! ❤️