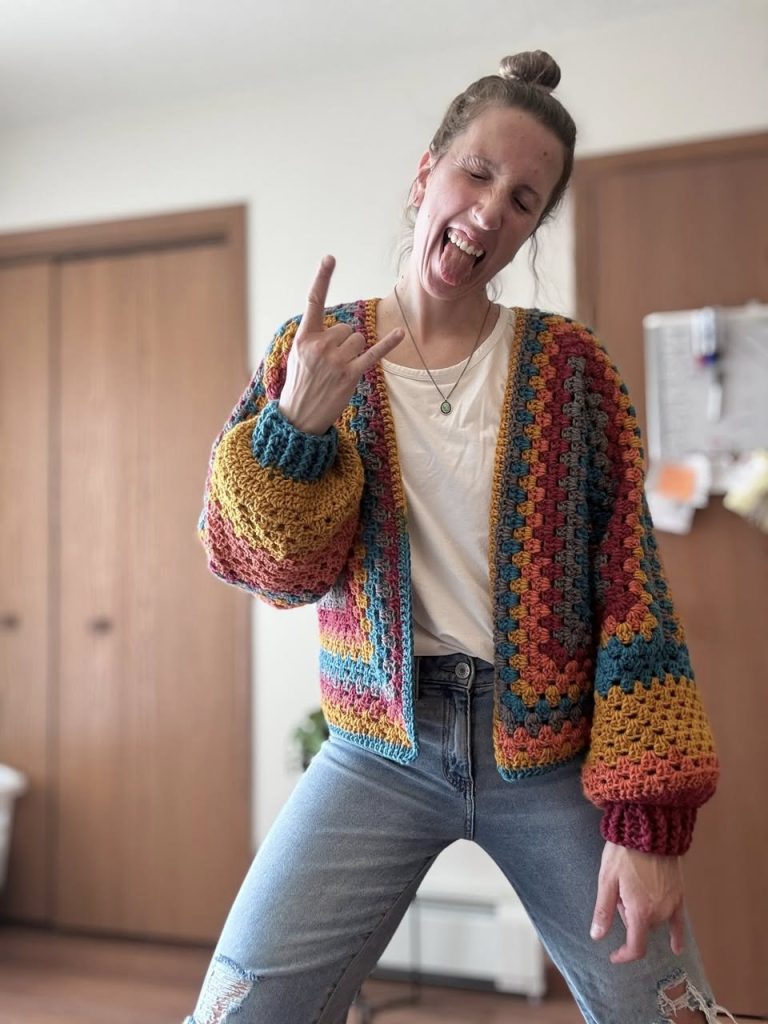
Sunset Granny Cardi (Crochet Cardigan) — Step-by-Step Pattern
There’s something instantly joyful about a bold, color-blocked granny cardigan. It’s cozy, modern, and the perfect “throw-it-on” layer for jeans, dresses, or lounging at home. This style is especially fun because it looks impressive, but it’s built from simple stitches and repeatable rows.
This cardigan is also a great stash-buster. You can use leftover skeins in playful stripes, or keep it more curated with a planned palette. The texture comes from classic granny clusters, which means the fabric is warm but still drapes nicely.
The look you’re going for here is a relaxed fit with a slightly cropped body, oversized balloon sleeves, and ribbed cuffs. The best part? You can try it on as you go and adjust length easily.
If you’ve crocheted granny squares before, you’ll fly through this. And if you haven’t—don’t worry. This pattern teaches the granny stitch in a straight panel format, which is even simpler than working in the round.
Skill Level
Easy–Intermediate (mostly repeats)
Finished Look
Open-front cardigan with granny stitch panels, wide sleeves, and ribbed cuffs.
Materials
- Worsted/Aran weight yarn (Category 4) in multiple colors
Tip: 5–8 colors looks amazing for this style. - 6.0 mm (J-10) crochet hook (or size needed for gauge)
- 5.0 mm hook (optional, for cuffs/edging if you want tighter ribbing)
- Scissors
- Yarn needle
- Stitch markers
- Measuring tape
Sizes (Adjustable)
This pattern is written to be made-to-measure (S–3XL friendly).
Key Measurements
- Body width (back panel): your bust measurement ÷ 2 + 6–10 in (15–25 cm) ease
- Body length: shoulder to desired hem
- Sleeve length: shoulder to wrist
- Upper sleeve width: comfortable oversized circumference (try on!)
Stitches & Abbreviations (US Terms)
- ch = chain
- sl st = slip stitch
- sc = single crochet
- dc = double crochet
- sk = skip
- sp = space
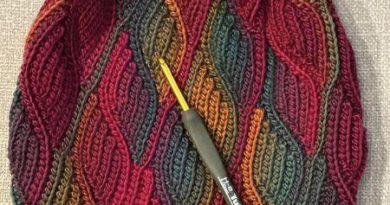
- Granny cluster = 3 dc in the same space
Granny Stitch Row (Flat)
Clusters are worked into chain spaces from the row below.
Gauge (Optional but Helpful)
About 14–16 dc = 4 in (10 cm) using 6.0 mm hook (varies by yarn).
If your fabric is stiff, go up a hook size.
Construction Overview
You will crochet:
- Back panel (rectangle)
- Two front panels (rectangles)
- Two sleeves (worked flat or in the round)
- Cuffs (ribbing)
- Join + edging (front border + hem + neckline)
1) Back Panel
Step 1: Foundation Chain
Chain a number that fits your back width and works with granny stitch:
Multiple of 3 + 2 is a great rule of thumb.
Example starting points (adjust as needed):
- S/M: ch 86–98
- L/XL: ch 104–116
- 2XL/3XL: ch 122–134
Step 2: Row 1 (Set-Up)
- Dc in 4th ch from hook (counts as first dc).
- Dc in next ch.
- Granny cluster (3 dc) in next ch.
- Skip 2 ch.
- Repeat: 3 dc in next ch, sk 2 ch across.
- End with 1 dc in each of the last 2 chains (to keep edges neat).
Step 3: Row 2 and Onward (Granny Rows)
- Ch 3, turn (counts as dc).
- Work 3 dc in first space (right at the edge, if your stitch layout creates a space).
- Work 3 dc in each ch-2 space across.
- At the end: dc into the top of the turning chain.
Step 4: Color Changes (Optional)
To change colors cleanly:
- On the last dc of the row, stop when 2 loops remain on the hook.
- Yarn over with the new color and pull through to finish the stitch.
Step 5: Length
Repeat rows until the back panel reaches your desired length (slightly cropped looks modern).
2) Front Panels (Make 2)
Each front panel is a narrower rectangle.
Step 1: Width
Each front panel should be about half the back panel width, minus a little if you want a slimmer opening.
Example:
- If your back panel is 22 in (56 cm) wide, make each front about 10–11 in (25–28 cm).
Step 2: Crochet Like the Back Panel
Use the same granny stitch method and work until the front panels match the back panel length.
3) Assemble the Body
Step 1: Seam Shoulders
Lay the pieces flat:
- Place front panels on either side of the back panel.
- Seam shoulders, leaving a neck opening.
Seam option: whip stitch or mattress stitch.
Step 2: Seam Sides (Leave Armholes)
Fold cardigan and seam the sides from hem upward, stopping where you want the armholes.
A good armhole depth is usually:
- 7–9 in (18–23 cm) for S/M
- 9–11 in (23–28 cm) for L/XL+
But the best method: try it on and mark.
4) Sleeves (Make 2)
You can crochet sleeves flat and seam or join and work in the round. For the balloon sleeve look, keep the upper sleeve roomy.
Option A: Flat Sleeves (Easy)
- Chain to match your upper-arm width (oversized is good).
- Work granny stitch rows until sleeve length is close to your wrist.
- To create the balloon shape, you can keep width consistent, then add a tighter cuff.
Optional sleeve taper: every few rows, reduce one cluster near the edges.
Attach Sleeve
- Sew sleeve into armhole, matching center of sleeve top to shoulder seam.
Seam Sleeve
- Fold sleeve and seam from wrist to underarm.
5) Ribbed Cuffs (Signature Finish)
This cardigan style looks amazing with thick ribbed cuffs.
Step 1: Pick Up Stitches
With cuff color, join yarn at sleeve end.
Work 1 round/row of sc evenly around sleeve opening.
Step 2: Ribbing (Back Loop Only)
Ch 9–15 (depending on how tall you want the cuff).
Ribbing row:
- Sc in 2nd ch from hook and in each ch across.
- Sl st into the next 1–2 stitches on the sleeve edge.
- Turn, skip sl sts, sc back across in back loops only.
- Repeat until ribbing wraps around the sleeve.
- Seam ribbing ends together.
Repeat for the other sleeve.
6) Front Border + Neckline + Hem
A clean border pulls the whole cardigan together.
Step 1: Front + Neckline Border
Join yarn at bottom of one front panel.
Work:
- 1 row of sc evenly up the front, around neckline, and down the other front.
- Add 1–2 more rows for a thicker frame.
Tip: Place (sc, ch 1, sc) in corners to prevent curling.
Step 2: Bottom Hem
Work 1–3 rows of sc around the hem for structure.
7) Weave In Ends + Block
- Weave in all ends securely.
- Lightly block (steam or gentle wet blocking) to relax stitches and improve drape.
Customization Ideas
- Lengthen it: add more rows to body panels.
- Make it warmer: use bulky yarn + bigger hook.
- Add pockets: crochet 2 small granny rectangles and stitch on.
- Make it more polished: add a belt tie or a single button closure.
Quick Troubleshooting
- Edges wavy? Too many clusters at the ends—make sure you’re ending with a clean dc into the turning chain.
- Fabric stiff? Go up a hook size.
- Sleeves too wide? Reduce clusters gradually as you approach the cuff.