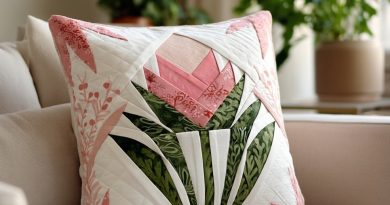
Art-Deco Fan Leaf .
Made with foundation paper piecing (FPP). The block finishes “on point,” which gives that elegant diamond look. Work one block for a cushion or sew several for a striking quilt or runner.
This design shines when you mix tone-on-tone aquas and teals against a pale background. The leaf “veins” read darker; the outer fronds read a touch lighter. Because it’s paper pieced, every curve is actually a gentle straight seam—crisp points, no stress.
I sized the pattern to 10½″ unfinished (10″ finished), perfect for sampler quilts. You can scale it up or down when printing: set your printer to a specific percentage (e.g., 120% for a 12½″ unfinished block) and always check the 1″ calibration square on the template.
If you’re new to FPP, this is a friendly block: five wedge sections (A–E) flow from the center to the edges, then four background corners square it up. Shorten your stitch length and press well as you go—the block practically builds itself.
Materials (per 10½″ unfinished block)
- Leaf fabrics: 5–6 aqua/teal prints (strips at least 2½″ × 10″ each)
- Background: ¼ yd of pale solid (or two strips 3½″ × WOF plus scraps)
- Thin copy paper or foundation paper; printer
- Rotary cutter, small ruler, add-a-quarter ruler (helpful), glue stick or pins
- Sewing machine, short stitch length (1.3–1.6 mm)
- Iron/pressing surface
Download/Prepare the Template
- Create five wedge sections labeled A, B, C, D, E plus four background corners S1–S4. (One page with all pieces fits Letter/A4.)
- Print at 100% with a 1″ test square.
- Lightly score the seam lines with a blunt tool to make paper removal easy.
Tip: If you want a freezer-paper, paperless FPP method, trace each section onto freezer paper and reuse it several times.
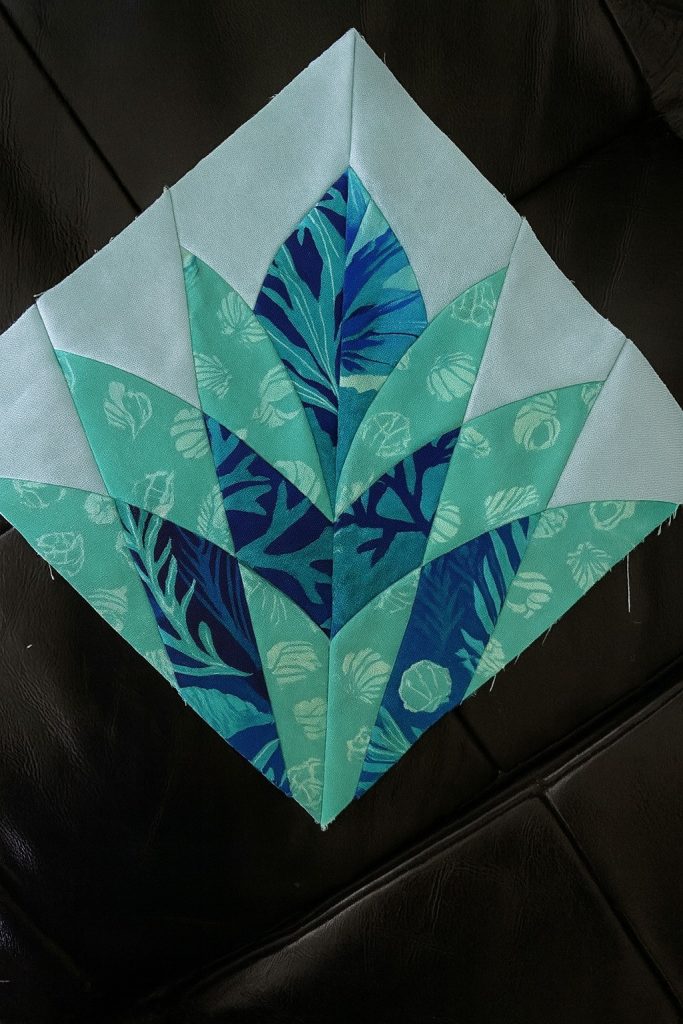
Color Map
- Center vein: darkest teal (Section A).
- Mid fronds: medium teals (Sections B & D).
- Outer fronds: light teals (Section C & E).
- Background: pale solid for corners S1–S4 and the thin side slivers at the top of sections.
Step-by-Step (FPP)
1) Cut Rough Pieces
- From each leaf print, cut rough rectangles ½–1″ larger than the patch they’ll cover (eyeball from the paper).
- From background, cut several rectangles 3″ × 5″ for corner/edge patches.
2) Piece Section A (center)
- Place A1 (darkest teal) wrong side to the unprinted side of paper; glue or pin.
- Align A2 (background sliver) right sides together with A1 along the printed line; sew on the line with short stitches.
- Flip A2 open and press.
- Continue adding patches in numerical order for Section A.
- Trim the section on the outer seam allowance line (¼″ past the solid outline).
3) Piece Sections B–E (left and right fronds)
- Repeat the same process for B, C, D, E, alternating light/medium/dark teals so the “feathers” radiate outward.
- After each seam, trim the excess with your add-a-quarter ruler and press before the next patch.
4) Join the Wedges
- Sew A to B, press seam toward the darker unit.
- Add C to the AB unit; press.
- Add D, then E, pressing after each seam.
- You now have the full fan-leaf diamond (still on paper).
5) Square with Background Corners
- Position background triangles/rectangles S1–S4 to the four sides of the diamond (top, bottom, left, right) so the block becomes a square on point.
- Sew S1–S4 to the fan unit, press seams away from the leaf.
- Trim the block to 10½″ × 10½″ using the outer dashed line or your square ruler.
6) Remove Paper
- Loosen the paper by running a blunt tool along seams, then carefully tear from the outer edges inward. Press the block flat with steam.
Pressing Plan (for a flat block)
- Press toward the darker fabric after each seam inside the wedges.
- After joining wedges, press the long seams open to minimize bulk.
- Final press from the right side with light steam and a clapper if you have one.
Scaling & Variations
- 12½″ unfinished: print at 120%.
- 8½″ unfinished: print at 80% (use skinnier strips).
- Mirror the color order on alternating blocks or rotate blocks 90° to create chevrons, tulips, or waves across a quilt. Sashing in the background color makes the leaves float.
Yardage for a Throw (48″ × 60″)
- Make 20 blocks (4 × 5 layout).
- Leaf prints: fat-eighth bundle (or 6 FQs).
- Background: 2 yards (includes sashing/border allowance).
- Binding: ½ yard. Backing: 3½ yards.
Quilting Ideas
- Echo-quilt ⅛–¼″ inside each wedge to emphasize the leaf.
- Fill background with a soft wavy or serpentine line to imply wind/water.
- A 40-wt thread in pale aqua blends beautifully.