Scrap Quilt with Sashing – Step by Step Tutorial
Introduction
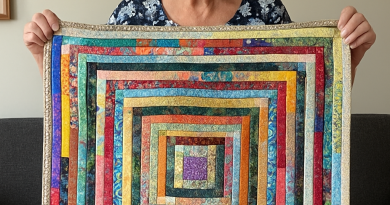
Quilting is a wonderful way to turn small pieces of fabric into something meaningful, cozy, and full of personality. One of the most beloved styles among quilters is the scrap quilt. This type of project embraces the beauty of variety, using leftover fabrics to create a vibrant and unique masterpiece. Each square tells its own story, and together they form a quilt filled with charm and history.
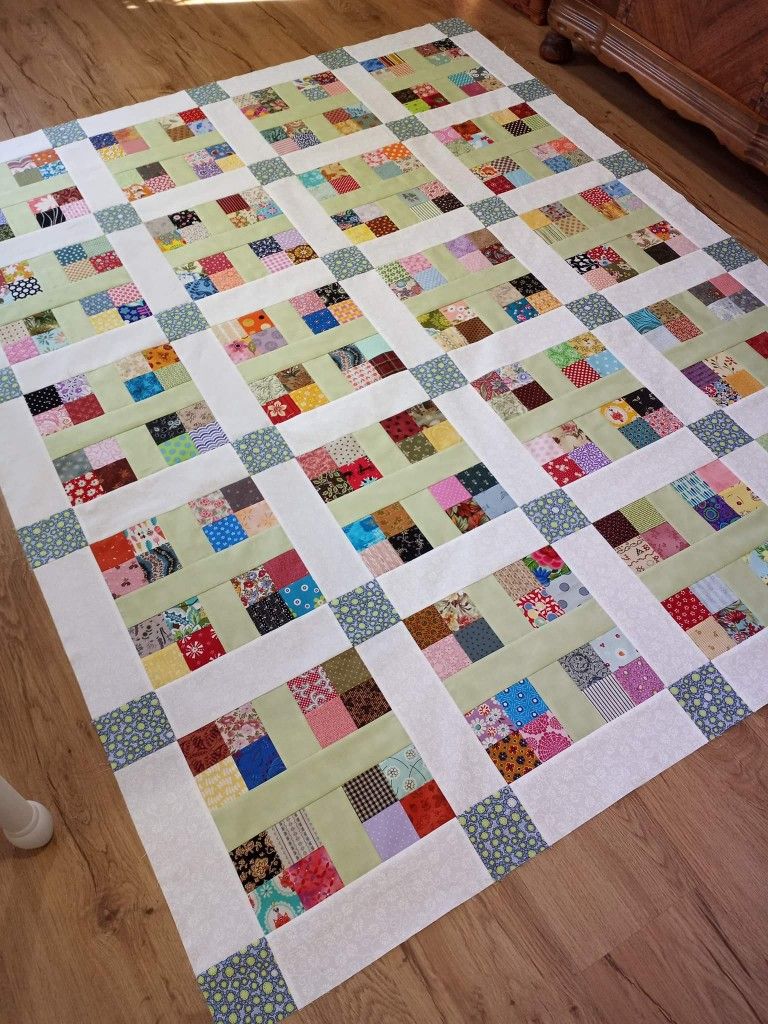
The quilt you see here is a perfect example of how scraps can be transformed into order and harmony. By adding neutral sashing strips between the colorful blocks, the design becomes balanced and structured, while still showcasing the joyful explosion of colors and prints. This technique makes the quilt look clean and organized, even though the blocks themselves are made of random fabrics.
What makes this quilt especially special is that it’s sustainable and sentimental. Many quilters love using scraps because they save materials, reduce waste, and bring back memories of past sewing projects. A quilt like this may include pieces from old dresses, shirts, or other quilts, making it not just a blanket but a keepsake filled with emotions.
In this step-by-step guide, I’ll show you how to recreate this lively scrap quilt with sashing. Whether you’re an experienced quilter with bins full of fabric or a beginner looking for a fun and creative project, this design is approachable, practical, and incredibly rewarding.
Materials Needed
- A large variety of fabric scraps in different colors and prints
- Neutral fabric for sashing (beige, white, or light gray works best)
- Rotary cutter, ruler, and cutting mat
- Sewing machine and thread
- Iron and ironing board
- Batting and backing fabric
- Binding fabric
Step-by-Step Instructions
Step 1: Prepare the Fabric Scraps
- Collect and press your scraps to remove wrinkles.
- Cut them into strips of different widths (between 1.5″ to 3″).
- Make sure you have enough variety to create blocks that look colorful and fun.
Step 2: Assemble the Scrap Blocks
- Choose a few strips and sew them together side by side.
- Keep adding strips until you create a block that measures around 10″ x 10″.
- Trim the block neatly to size.
- Repeat until you have enough blocks to cover your quilt size.
Step 3: Add the Sashing
- Cut neutral sashing strips (about 2.5″ wide).
- Sew one strip between each block in a row.
- Add longer sashing strips between each row to separate them.
- This will frame your colorful blocks and give the quilt a neat, structured look.
Step 4: Assemble the Quilt Top
- Once all rows and sashing are sewn, press the quilt top flat.
- Square up the edges if needed to prepare for quilting.
Step 5: Quilting and Finishing
- Layer the quilt top, batting, and backing fabric.
- Pin or baste the layers together.
- Quilt as desired—straight-line quilting works beautifully for this style.
- Trim excess batting and backing, then add binding around the edges to finish.
✨ And now you have a colorful, cheerful scrap quilt that turns leftover fabric into a functional and beautiful treasure!