Nature-Inspired Quilting: Serene Mountain Landscape Quilt
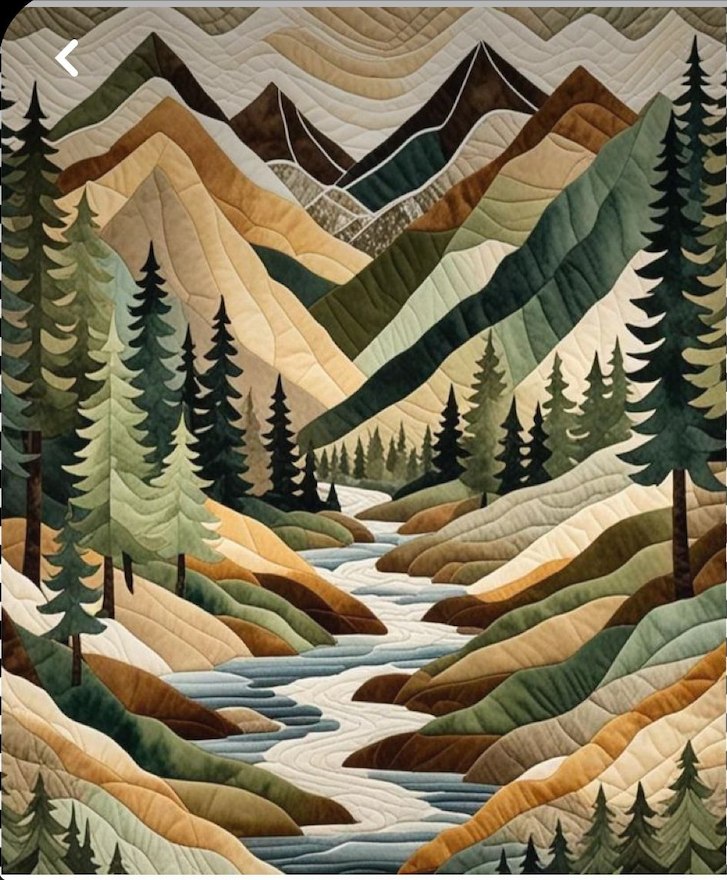
There’s something profoundly calming about recreating nature’s beauty through quilting. This stunning mountain landscape quilt captures the flowing movement of a river, the majesty of distant peaks, and the quiet strength of evergreen trees. It’s not just a blanket—it’s a window into a peaceful forest valley, stitched with intention, patience, and love.
Projects like this one are perfect for quilters who want to explore pictorial quilting, combining artistry with technical precision. Whether you’re decorating a cozy cabin, creating a meaningful gift, or simply bringing a bit of nature indoors, this quilt is sure to make an impression.
Creating a quilt that captures the essence of nature is a deeply fulfilling experience for any quilting enthusiast. There’s something magical about translating the beauty of a landscape—towering mountains, flowing rivers, and forested valleys—into a textile piece that can be held, admired, and cherished. The quilt featured in this article reflects exactly that: a serene mountain scene, full of natural movement, depth, and harmony. Projects like this invite us to slow down, appreciate the patterns of the natural world, and express that wonder through our stitches. Whether you’re a seasoned quilter or someone ready to explore scenic designs for the first time, this tutorial will guide you step by step in creating your own landscape masterpiece.
Mountain Landscape Quilt: Step-by-Step Tutorial
Materials Needed:
- Fabric in various earthy tones: browns, greens, blues, creams, and whites
- Rotary cutter and cutting mat
- Quilting ruler
- Sewing machine
- Coordinating thread
- Fusible web (if using applique)
- Batting
- Backing fabric
- Iron and ironing board
- Optional: Free-motion quilting foot for custom quilting
Step 1: Choose Your Color Palette Select fabrics that reflect the natural colors of mountains, trees, rocks, and rivers. This quilt uses shades of olive, tan, rust, forest green, and icy blues to bring the scene to life.
Step 2: Sketch or Use a Template Start with a rough sketch or pattern of your mountain scene. Divide it into simple shapes for each color section. If you’re using an existing pattern or digital design, print it to scale.
Step 3: Cut Your Fabric Shapes Using your pattern or sketch as a guide, cut each fabric piece according to its placement in the scene. For smoother curves and accuracy, you may want to use fusible webbing and cut the shapes using applique techniques.
Step 4: Assemble the Landscape Begin assembling your quilt top by placing the pieces in layers—starting from the background (mountains) and working forward (trees, river, foreground hills). Pin or fuse the pieces in place.
Step 5: Stitch the Pieces Sew the pieces together, either by piecing or applique. Use a zigzag or blanket stitch around applique edges. For layered raw-edge applique, use matching thread to stitch around each piece.
Step 6: Add Details Use free-motion quilting or embroidery to add texture—like tree bark, river ripples, or snowcaps on the mountains.
Step 7: Quilt the Layers Layer the quilt top, batting, and backing. Quilt using a walking foot or free-motion technique, following the flow of the landscape. Wavy horizontal lines can enhance the feeling of a natural scene.
Step 8: Bind and Finish Trim the quilt edges and bind with coordinating fabric. Add a label with the title and date for a personal touch.
Final Thoughts: This nature-inspired quilt isn’t just a cozy addition to your home—it’s a piece of art that reflects your love for the outdoors and your creativity. Take your time, enjoy the process, and let the peacefulness of the landscape flow through every stitch.
🌲 Step-by-Step Tutorial – Mountain & Forest Quilt
Finished size: Approx. 60” x 75”
Skill level: Intermediate
Techniques used: Appliqué, curved piecing, free-motion quilting
🧵 Materials Needed:
- Cotton quilting fabric in earth tones: greens, browns, beiges, blues, dark greys
- Batting (size according to finished dimensions)
- Backing fabric
- Lightweight fusible web (for appliqué)
- Thread (neutral and variegated tones)
- Rotary cutter, ruler, and cutting mat
- Sewing machine (with free-motion quilting foot if possible)
- Pencil or fabric marker
🏞️ Cutting the Pieces:
- Mountains: Use various shades of brown, tan, and dark green to form the sloping shapes. These can be cut freehand for a more organic look or following a drawn template.
- Trees: Cut triangles or tapered rectangles for the tree layers. Vary the height and color for a natural forest effect.
- River and Ground Layers: Cut long, wavy strips of fabric in light blue for the river, and use green and brown strips for the land on each side.
- Sky and Background Peaks: Use light beige or soft white fabrics to simulate distant snow-covered mountains.
🧩 Piecing and Assembly:
- Background First: Start from the top, sewing the sky and back mountains in layers.
- Build Downward: Add each hill and land layer, curving slightly to mimic the terrain. Use curved piecing techniques or raw-edge appliqué.
- Add the River: Insert wavy river strips flowing through the center and tapering into the horizon.
- Apply the Trees: Use fusible web to apply tree shapes. Stitch down using zigzag or satin stitch.
- Borders (optional): Add a narrow green or brown border to frame the piece.
✨ Quilting:
Use free-motion quilting to enhance the terrain—gently wave through the river, add texture to the hills, and outline trees for depth. You can even quilt tree bark or mountain ridges for realism.
❤️ Final Thoughts:
This quilt is more than just a decorative piece—it’s a tribute to nature’s stillness and grandeur. Each stitch flows like the river, carving its way through color and form. Whether hung on a wall or draped across a bed, it brings serenity to any space.