Majestic Peacock Quilt Tutorial – Step-by-Step Guide
Majestic Peacock Quilt Tutorial – Step-by-Step Guide (English)
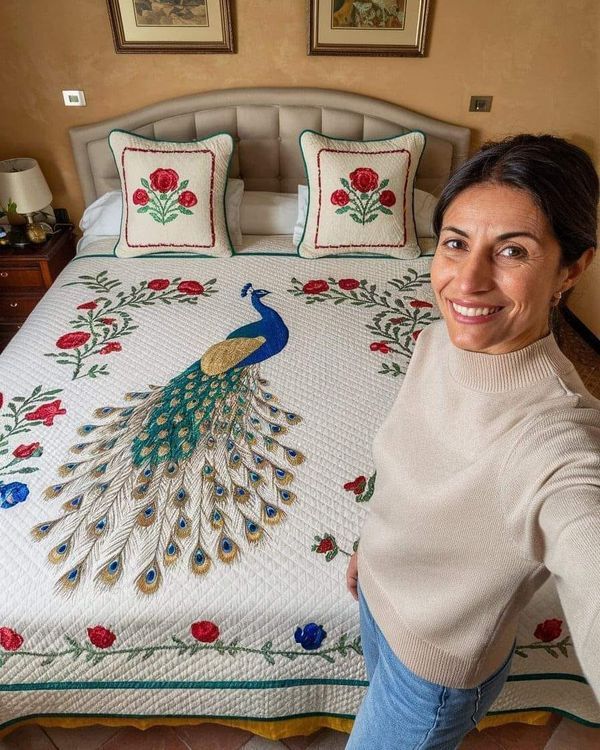
Introduction: Quilting is more than a craft—it’s a way to tell stories through fabric and thread. This stunning peacock quilt is a beautiful example of artistry meeting tradition, transforming a bedspread into a centerpiece of the bedroom. The rich detailing of the peacock’s feathers and the floral border create a timeless design that speaks to elegance, patience, and the joy of handmade beauty.
The symbolism of the peacock, often associated with renewal, pride, and vision, adds deeper meaning to this quilt. With its striking blue plumage and eye-catching golden accents, this quilt project allows quilters to explore advanced applique and embroidery while still working within a structured format.
Whether you’re an experienced quilter or an enthusiastic beginner looking for a project that makes a statement, this tutorial will help you recreate this vibrant peacock quilt from start to finish. It combines applique, embroidery, and traditional quilting techniques for a breathtaking result.
Materials Needed:
- White cotton fabric for quilt top (approx. 2.5m x 2.5m)
- Assorted cotton fabrics in blues, greens, golds, and reds (for peacock and flowers)
- Lightweight fusible web
- Embroidery floss (blue, green, gold, black, red)
- Batting
- Backing fabric (same size as quilt top)
- Sewing machine
- Iron
- Quilting ruler, scissors, rotary cutter, and cutting mat
- Quilting thread
Step 1: Prepare the Quilt Top
- Cut the white fabric to desired size (king or queen bed size).
- Press the fabric to remove wrinkles.
Step 2: Create the Peacock Applique
- Choose fabrics for the peacock body and feathers.
- Trace the peacock shape (you can enlarge an image or use a template).
- Cut out the shapes and apply fusible web to the back.
- Position the pieces on the center of the quilt top.
- Fuse them with an iron according to the fusible web instructions.
Step 3: Add Floral and Leaf Appliques
- Cut out roses and stems using red and green fabrics.
- Position them in the border area of the quilt top.
- Fuse in place as you did with the peacock.
Step 4: Embroider the Details
- Use embroidery floss to outline the peacock’s feathers, body, and flowers.
- Add texture and dimension by stitching feather eyes with gold and blue floss.
- Add any custom embroidery to enhance the floral border.
Step 5: Assemble the Quilt Sandwich
- Lay the backing fabric right side down.
- Place the batting on top.
- Lay the quilt top (with applique) right side up.
- Smooth all layers and baste using safety pins.
Step 6: Quilt the Layers
- Quilt around the peacock and flowers with a walking foot.
- Add free-motion quilting in the background if desired.
- Outline quilt blocks or add echo quilting around the peacock for emphasis.
Step 7: Bind the Quilt
- Cut strips of green fabric for binding.
- Sew the binding around the quilt edges using your preferred method.
Finishing Touches:
- Label your quilt with your name and the year.
- Wash gently and dry flat.
- Lay it on the bed and admire your masterpiece!
This peacock quilt is not just a blanket—it’s an heirloom. Take your time, enjoy each step, and create something to be cherished for generations.