Colorful Crochet Denim Jacket: A Fusion of Classic Style and Handmade Charm
There’s something timeless about denim jackets—they’re versatile, sturdy, and forever in fashion. But when combined with the soft touch of crochet, they become something entirely magical. This vibrant jacket merges two worlds: the reliability of denim and the joyful artistry of handmade granny squares.
Crochet fashion is making a big comeback, especially in the U.S., where fiber artists and beginners alike are adding color and flair to everyday wear. This project is a wonderful way to upcycle an old denim jacket or create a completely new statement piece. Whether you’re attending a market, enjoying a coffee out, or gifting something handmade, this jacket is sure to turn heads and start conversations.
In this tutorial, I’ll show you step-by-step how to create a denim jacket adorned with vibrant, textured granny squares—perfect for crochet lovers looking to explore wearable art. Let’s get creative!
Materials Needed:
- 100% cotton yarn in multiple bright colors (yellow, turquoise, purple, pink, orange, green, white, etc.)
- 4.0 mm crochet hook
- Tapestry needle
- Scissors
- Measuring tape
- Lightweight denim jacket (or jean shirt)
- Fabric glue or sewing thread and needle (optional)
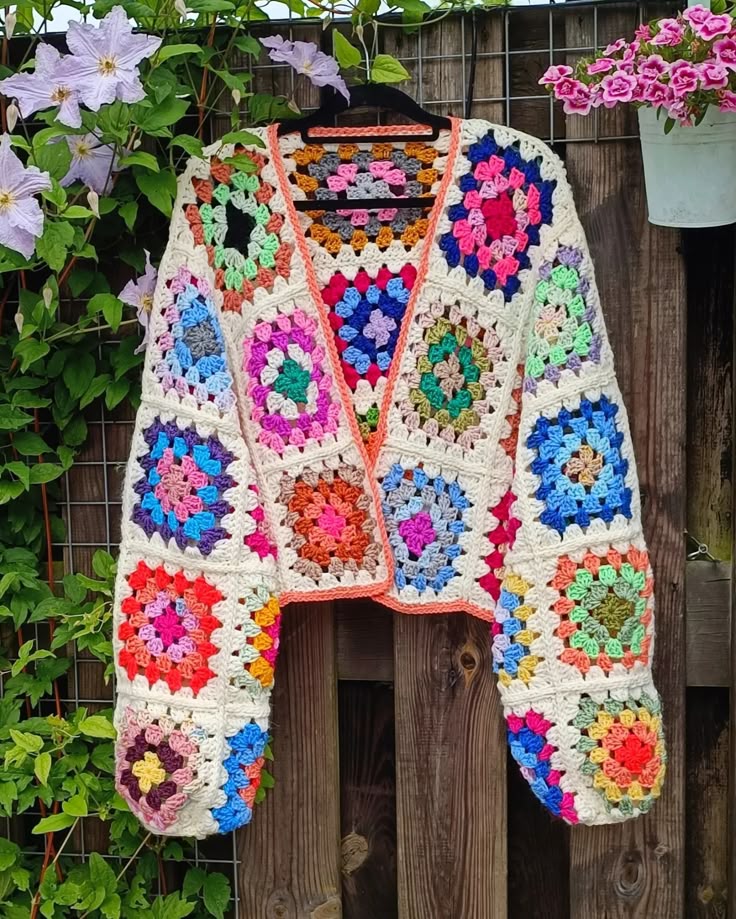
Step 1: Make Granny Squares
- Choose 5–7 yarn colors to alternate for your granny squares.
- Use the classic sunflower granny square or solid granny variation.
- Each square has:
- Round 1: Magic ring, ch 3, 11 dc inside ring (12 total). Join with sl st.
- Round 2: Change color, ch 3, dc in same st, 2 dc in each st around (24 total). Join.
- Round 3: Change color, ch 3, dc in next 2 st, 2 dc in next repeat around. Join.
- Round 4: Form corners using (3 dc, ch 2, 3 dc) in same stitch for each corner, separated by 3 dc groups on each side.
- Make approx. 30–40 squares depending on your jacket size.
Step 2: Layout and Positioning
- Arrange your squares on a flat surface in the pattern you like (try symmetrical color combos).
- Ensure you have enough to cover:
- Front panels
- Back panel
- Sleeves (if desired)
Step 3: Join Squares
- Use slip stitch or whip stitch to join squares edge to edge.
- Create a continuous panel for each jacket section.
Step 4: Attach to Jacket
- Place crochet panels over the denim jacket.
- Use fabric glue or hand sew using thread to secure them onto:
- Jacket front
- Jacket back
- Sleeves
- Leave the button panel, collar, and hem exposed for the denim contrast.
Step 5: Add Scalloped Edge (Optional)
- To add finishing detail:
- Attach yarn to the edge.
- Sc in next st, skip 1 st, 5 dc in next st, skip 1 st repeat all around.
Final Touches:
- Weave in all yarn ends.
- Add wooden or vintage-style buttons if desired.
- Steam block gently to shape.