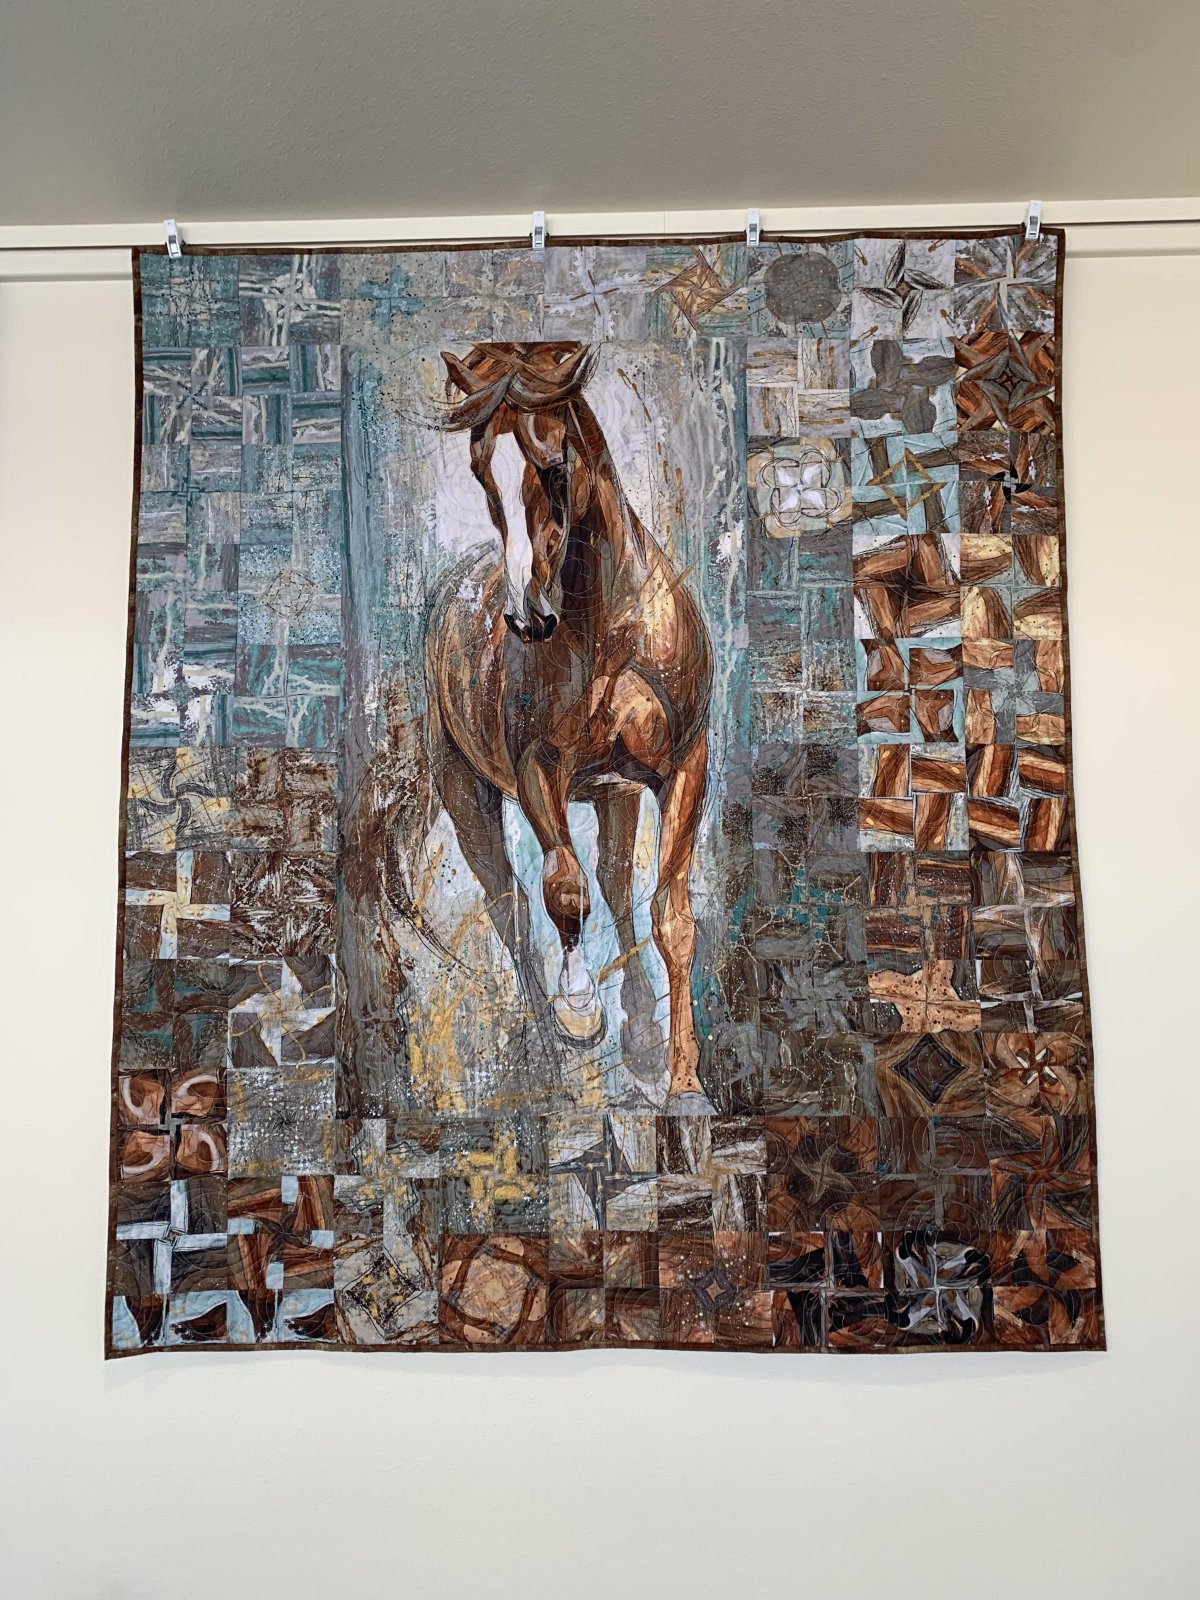
Horse Kaleidoscope Quilt – A Masterpiece of Motion, Texture and Precision
This quilt is more than a craft — it’s a true textile painting. The magnificent Horse Kaleidoscope Quilt showcases the power and grace of a galloping horse, brought to life through intricate fabric placement and kaleidoscopic piecing. Every shape, every starburst, and every stitch works together to create an illusion of depth and motion, capturing the wild spirit of the animal in an explosion of earthy and metallic tones.
Designed with advanced quilting techniques, this project requires not only precision but also vision. The background is filled with hexagons and star-shaped kaleidoscope blocks, creating a dynamic texture that seems to ripple and swirl around the horse — almost like wind or energy flowing from the animal’s stride.
This type of quilt is perfect for art lovers, horse enthusiasts, and experienced quilters looking to push their creative boundaries. It blends traditional craftsmanship with a contemporary aesthetic, transforming a functional quilt into a piece of gallery-worthy art.
✂️ Materials Used:
- Printed fabrics with repeating motifs for kaleidoscope cuts
- Earth-toned and metallic quilting cottons
- Horse panel or fussy cut design for the central image (or appliqué method)
- Quilter’s ruler, cutting mat, and rotary cutter
- Foundation paper for English paper piecing (optional)
- Free-motion quilting thread in various tones (bronze, ivory, copper, grey)
- Batting and wide backing fabric
- Sewing machine with walking foot and/or FMQ foot
- Binding fabric to complement the borders
🪡 Construction Overview:
1. Kaleidoscope Block Creation
Cut identical wedges from repeating fabric patterns using a 60-degree ruler. Sew them into hexagons and starburst shapes, aligning the pattern carefully for that mesmerizing mirrored effect.
2. Design Placement
Choose the layout that centers the quilt around the horse image. This can be a printed panel or appliquéd silhouette. Place the blocks so the motion of the stars surrounds and enhances the shape of the horse.
3. Assembling the Top
Join the blocks in rows or in a medallion format, ensuring the transitions between blocks are smooth and maintain visual flow. Leave room for borders and framing.
4. Quilting the Texture
Use free-motion quilting or detailed stitch-in-the-ditch to enhance the direction and movement of the kaleidoscope motifs. Echo the horse’s outline and give dimension to the body using thread painting.
5. Finishing Touches
Add borders using one of the darker tones for contrast. Bind the quilt with coordinating fabric and attach a hanging sleeve if it will be displayed on the wall.
💡 Tips & Ideas:
- Use a horse photo transfer or print on fabric to create your own centerpiece if you don’t have a horse panel.
- This technique also works beautifully with wolves, owls, or eagles for a wild nature theme.
- Add metallic thread in small doses for extra shimmer and definition.
- Consider entering your version in a quilt show or exhibition — it’s a real showstopper!