Peacock-Inspired Quilt Pattern – Step-by-Step Tutorial
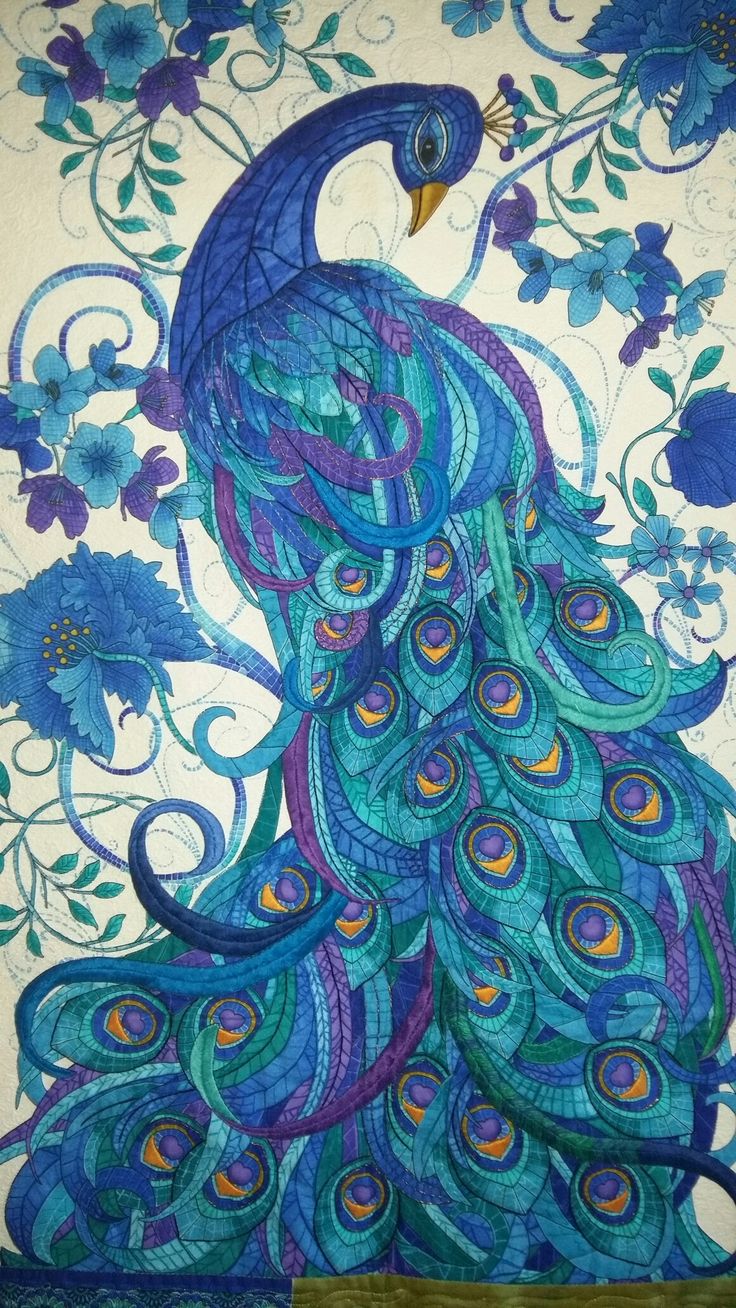
Introduction: The elegance and splendor of a peacock’s feathers have long been a favorite inspiration in textile arts. This breathtaking peacock quilt captures that majestic beauty with vibrant blues, purples, and turquoise tones, blending applique and free-motion quilting techniques. Perfect for advanced beginners to experienced quilters, this project offers the chance to explore color harmony and intricate fabric placement while crafting a statement piece.
Peacock motifs symbolize beauty, confidence, and vision, making this quilt ideal as a wall hanging, bed centerpiece, or a unique handmade gift. With this guide, you’ll bring the peacock’s plumage to life using fusible applique, bold stitching, and careful color planning.
Take your time with the feather detailing—this is what gives the quilt its unforgettable character. Whether you choose batik fabrics, solids, or printed cotton, be bold with your choices and trust the process. Let each fabric selection echo the vibrant personality of the peacock.
Get ready to dive into the shimmering feathers, flowing shapes, and layered textures of this masterpiece. Follow the instructions below to create your own peacock quilt that’s sure to impress!
Materials Needed:
- Peacock quilt panel or peacock template (if working from scratch)
- Variety of blue, turquoise, green, and purple cotton fabrics
- Background fabric (white or light tone)
- Fusible web (e.g., HeatnBond Lite)
- Iron and pressing cloth
- Scissors and rotary cutter
- Sewing machine with free-motion quilting foot
- Threads in coordinating colors
- Batting and quilt backing
Step-by-Step Instructions:
1. Preparing the Background:
- Cut a large piece of white or light-colored fabric to be your quilt’s base (approx. 40″ x 60″).
- Press and layer with batting and backing fabric.
2. Applique the Peacock Body and Tail:
- Using your template or panel, cut out feather and body shapes from your colored fabrics.
- Apply fusible web to the back of each piece, then press onto the background fabric according to your layout.
- Start from the bottom layers (tail) and build up to the peacock’s body and head.
3. Stitch Down the Applique:
- Use a tight zigzag or decorative stitch around each feather and body piece.
- Change thread colors as needed to blend with your fabric choices.
4. Quilting the Background and Details:
- Use free-motion quilting to enhance the feathers with swirl or plume patterns.
- Quilt floral details, outlines of feathers, or radiating lines to fill the background space.
5. Binding and Finishing:
- Trim the edges, square your quilt, and bind with a coordinating fabric.
- Add a sleeve to the back for hanging if desired.