Bold Daisy Quilt Pattern Tutorial
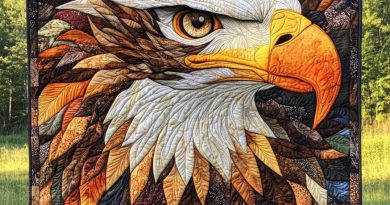
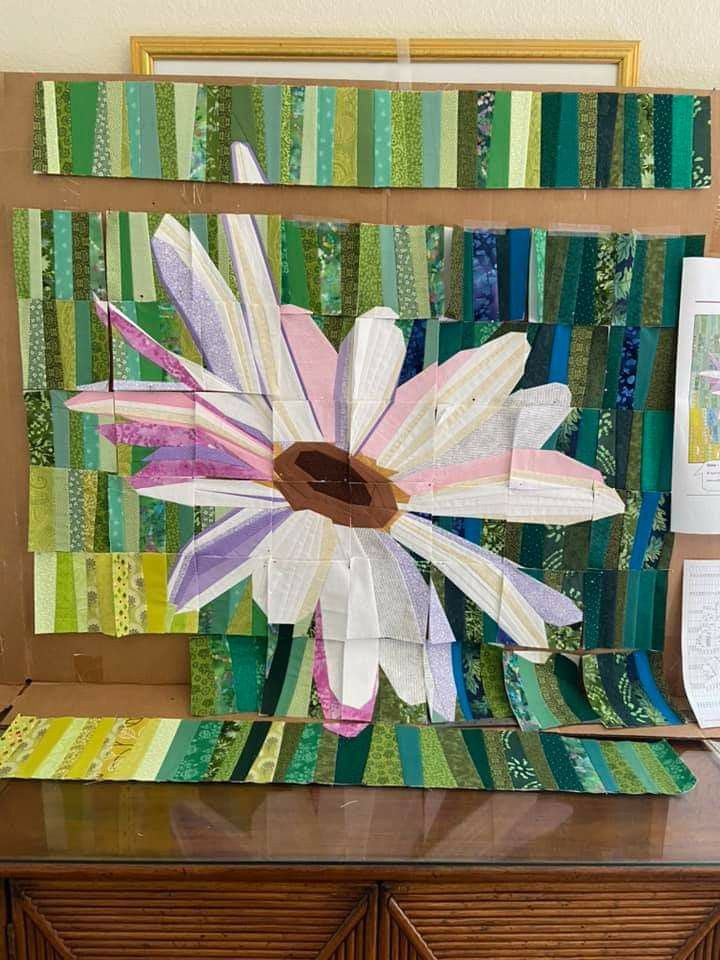
Introduction: Flowers have always been one of the most beloved sources of inspiration in quilting, and the daisy is a perfect representation of cheerfulness, purity, and resilience. This stunning quilt design captures the beauty of a single oversized daisy, its bright petals stretching across a textured background of cool blues and greens that resemble a garden bathed in morning dew. Whether you want to brighten your room or gift a handmade floral masterpiece, this quilt will be a joy to create and admire.
This tutorial breaks down the process of making this daisy quilt, including the background piecing, the raw edge applique technique for the flower, and the quilting steps that bring depth and dimension to the design. Let’s get started!
Materials Needed:
- Various blue and green fabric scraps (2.5″ x 5″ strips or fat quarters) for the background
- Assorted white, cream, lavender, pink, and purple fabrics for the petals
- Brown and yellow fabrics for the flower center
- Fusible web or fabric glue
- Lightweight batting
- Backing fabric (same size as top)
- Sewing machine and coordinating thread
- Rotary cutter, mat, scissors, quilting ruler
- Iron and pressing surface
Step 1: Create the Background Panel
- Select strips of cool-toned fabrics (a mix of greens, blues, teals, aquas).
- Sew the strips together in vertical rows of varying lengths.
- Press seams open or to one side.
- Trim to make a rectangle base approximately 60 x 60 inches (or desired size).
Step 2: Prepare the Daisy Applique
- Sketch or print a template of a large daisy with overlapping petals.
- Trace each petal individually onto fusible web or backing paper.
- Cut the petals out from white, light pink, and lavender fabrics.
- Do the same for the flower center using brown and golden yellow fabrics.
Step 3: Position and Fuse the Flower
- Arrange the petals on the background in a natural layered form.
- Place the flower center last, slightly overlapping the base of the petals.
- Once satisfied with placement, fuse the pieces in place with an iron.
Step 4: Stitch Down the Applique
- Use a zigzag or free-motion stitch around each petal and center to secure them.
- Use thread colors that match or contrast slightly for added detail.
Step 5: Quilt the Layers
- Create your quilt sandwich: backing, batting, top.
- Baste with safety pins or spray adhesive.
- Quilt around the flower with echo quilting or dense stippling.
- Quilt the background with vertical or wavy lines to mimic grass and air movement.
Step 6: Bind and Finish
- Trim the quilt edges.
- Prepare and sew binding around all edges.
- Add a label and give your quilt a final press.
Tips:
- Use batiks or textured fabrics for depth.
- Add hand embroidery or beads in the flower center for extra dimension.
- Personalize your flower colors to match your style or decor.
This daisy quilt is bold, joyful, and makes a big impact—just like the flower it celebrates. Let your creativity bloom!